Deploy ADDS on Windows Server 2016 using Powershell
Introduction
In a previous post we deployed ADDS using Server Manager. In this article we will be deploying Active Directory Domain Services using Windows PowerShell.
For that, there are a few prerequisites that must be met, namely:
- Ensure the server has a correct name.
- Set a static IP address.
- Ensure DNS is deployed and configured. (we will add this while setting up the Forest)
Let’s Start!
Setting the Powershell Execution Policy
Ok, but before starting the server must allow us to run powershell scripts, so, for that we should set the execution policy by running the Set-ExecutionPolicy cmdlet. It allows us to change the user preference for the execution policy of the shell. To verify the current status of the execution policy run the Get-ExecutionPolicy cmdlet, as shown below.
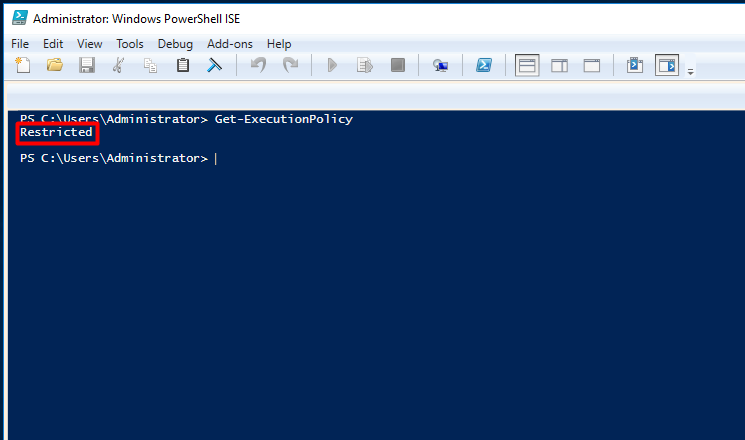
If the current status is “Restricted”, set it to allow scripts. As shown below, run the following:
| Set-ExecutionPolicy RemoteSigned -Force |
Run the Get-ExecutionPolicy cmdlet again, it will now show as RemoteSigned. Learn more about execution policies here: https://technet.microsoft.com/en-us/library/ee176961.aspx

Configuring the server
Renaming the Server
Now we can start configuring our server. The first step is ensure it has a correct name.
Run the following and change SRVAD01 to match the name you’d like your server to have.
| Rename-Computer -NewName SRVAD01 -Force |
The output should be as below. Restart the computer using Restart-Computer or the GUI.

Setting the Server’s IP Address
After rebooting set the IP address. Open the Powershell ISE, open a new script and paste the following code. Change the script to match your lan settings and press the “Run Script” button or F5. Note that I’m not setting a gateway just yet because I don’t have one.
#set static IP address
$ipaddress = “10.0.0.1”
$ipprefix = “8”
#$ipgw = “”
$ipdns = “127.0.0.1”
$ipif = (Get-NetAdapter).ifIndex
New-NetIPAddress -IPAddress $ipaddress -PrefixLength $ipprefix -InterfaceIndex $ipif #-DefaultGateway $ipgw
The output should be as shown below:
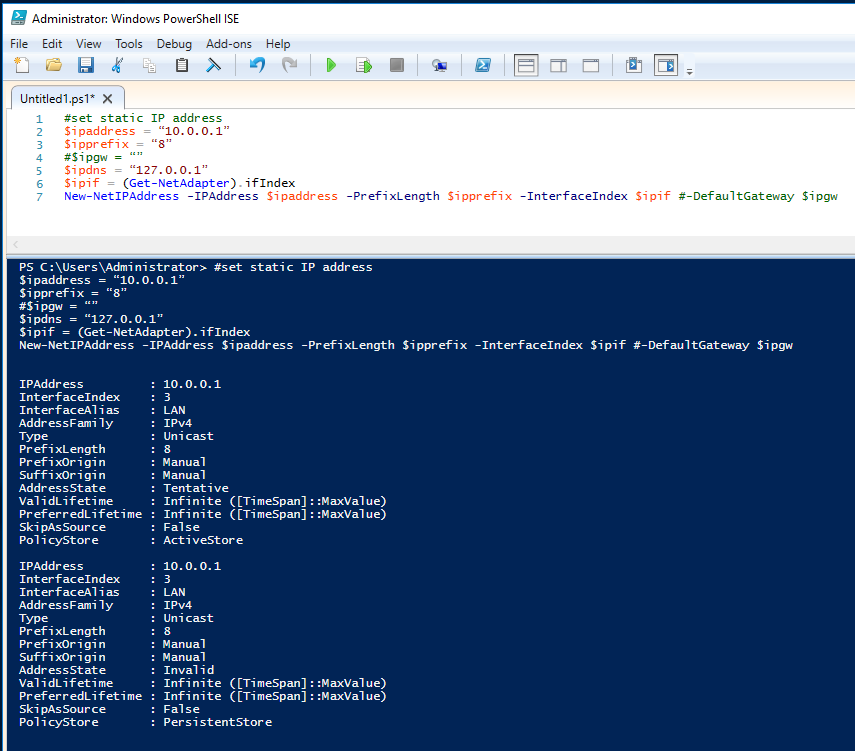
I also renamed my lan interface to LAN using the Rename-NetAdapter cmdlet, as shown below.
| Rename-NetAdapter -Name Ethernet -NewName LAN |
Add the ADDS Role
After these first initial steps of setting a computer name and a static IP address, it’s now time to add the Active Directory Domain Services role.
Just before doing that, and in addition to previous prerequisites, there are some role-based prerequisites that need to be deployed. These role-based prerequisites are:
- Active Directory module for Windows PowerShell
- Active Directory Administrative Center tools
- AD DS snap-ins and command-line tools
For the prerequisites installation we’ll be using a script and the first thing the script does is creating a log file called ADDS.txt in C:\Logs\ADDS. This log will hold the details from adding the features. After the configuration completes, it will run a Get-WindowsFeature command to gather the installed features to the log file described before.
Let’s add the RSAT-AD-Tools using the script below.
#install features
$featureLogPath = “c:\Logs\ADDS\ADDS.txt”
New-Item $featureLogPath -ItemType file -Force
$addsTools = “RSAT-AD-Tools”
Add-WindowsFeature $addsTools -LogPath $featureLogPath
Get-WindowsFeature | Where installed >> $featureLogPath
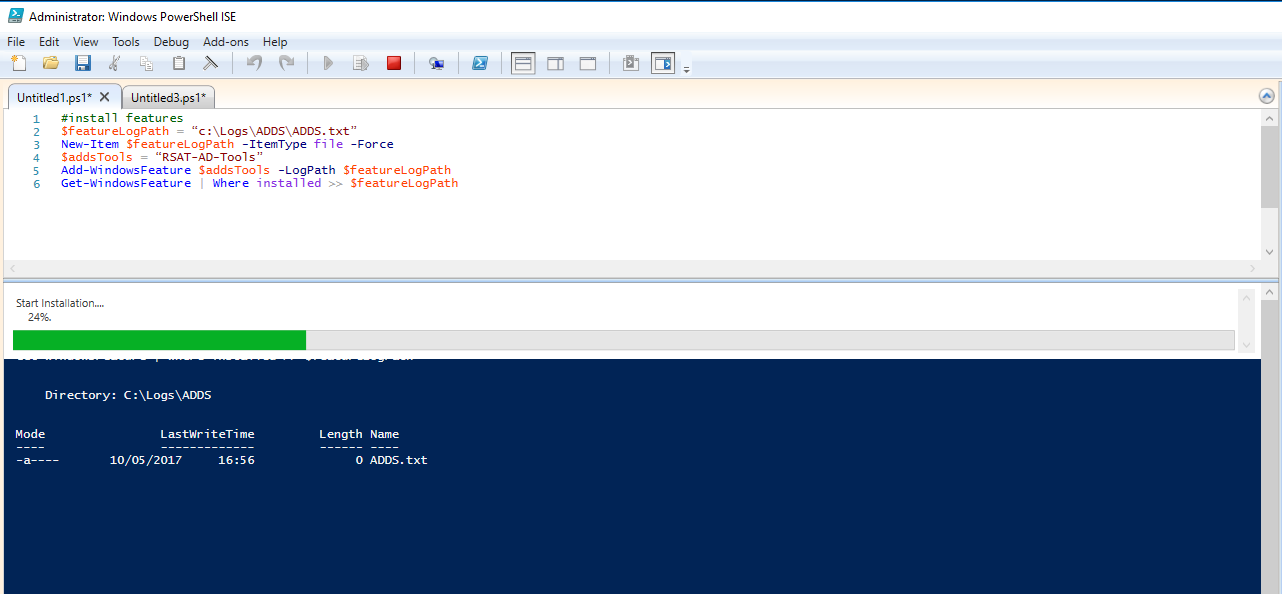
Wait for the installation to finish. You should get a progress bar as shown below:
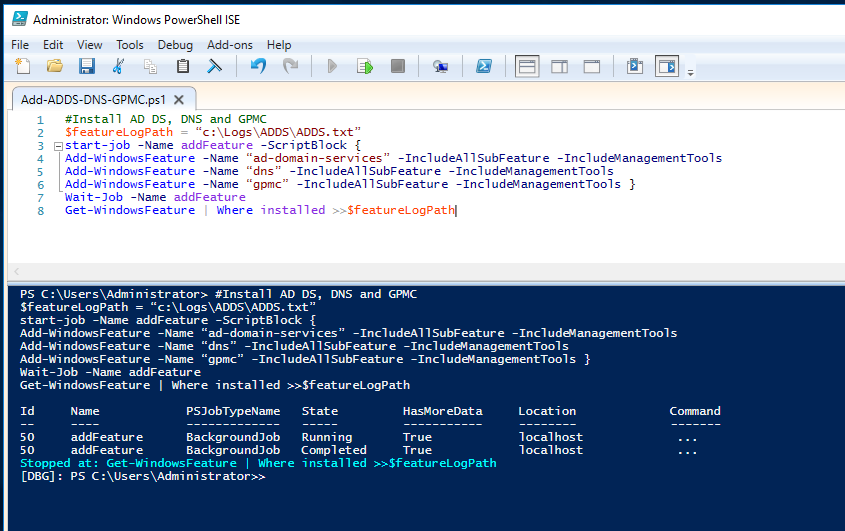
After installing the features install the ADDS role by running the following script (due to the use of the start-job feature, no progress bars will be shown):
#Install AD DS, DNS and GPMC
$featureLogPath = “c:\Logs\ADDS\ADDS.txt”
start-job -Name addFeature -ScriptBlock {
Add-WindowsFeature -Name “ad-domain-services” -IncludeAllSubFeature -IncludeManagementTools
Add-WindowsFeature -Name “dns” -IncludeAllSubFeature -IncludeManagementTools
Add-WindowsFeature -Name “gpmc” -IncludeAllSubFeature -IncludeManagementTools }
Wait-Job -Name addFeature
Get-WindowsFeature | Where installed >>$featureLogPath
This is something similar to this:
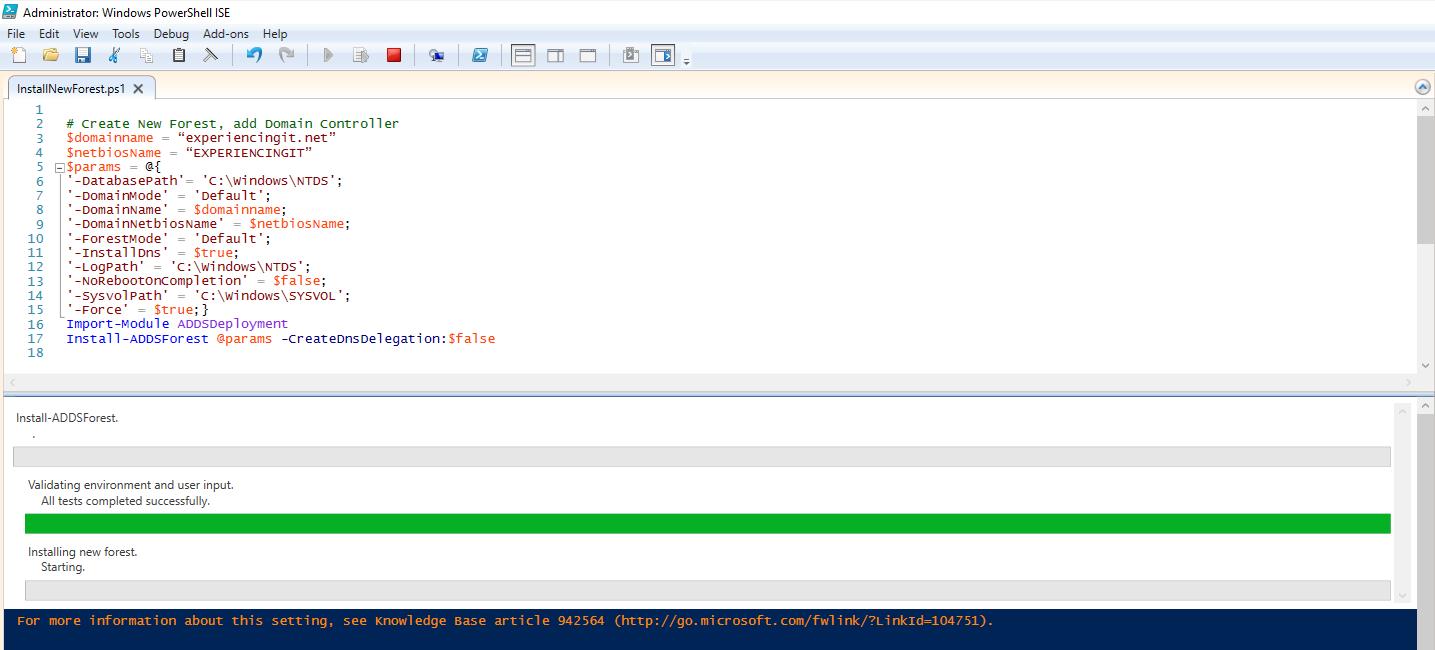
Now that the ADDS role has been added, it is time to create the new forest. For it run the script below, adjusting it to your needs. If you get an error, like this one:

set the execution policy to unrestricted with the
Set-ExecutionPolicy Unrestricted -Force
and try again.
Press “Run Once”

The script will ask you the SAfeModeAdministratorPassword.
# Create New Forest, add Domain Controller
$domainname = “experiencingit.net”
$netbiosName = “EXPERIENCINGIT”
$params = @{
'-DatabasePath'= 'C:\Windows\NTDS';
'-DomainMode' = 'Default';
'-DomainName' = $domainname;
'-DomainNetbiosName' = $netbiosName;
'-ForestMode' = 'Default';
'-InstallDns' = $true;
'-LogPath' = 'C:\Windows\NTDS';
'-NoRebootOnCompletion' = $false;
'-SysvolPath' = 'C:\Windows\SYSVOL';
'-Force' = $true;}
Import-Module ADDSDeployment
Install-ADDSForest @params -CreateDnsDelegation:$false
Wait for the deployment to finish. The server will reboot.
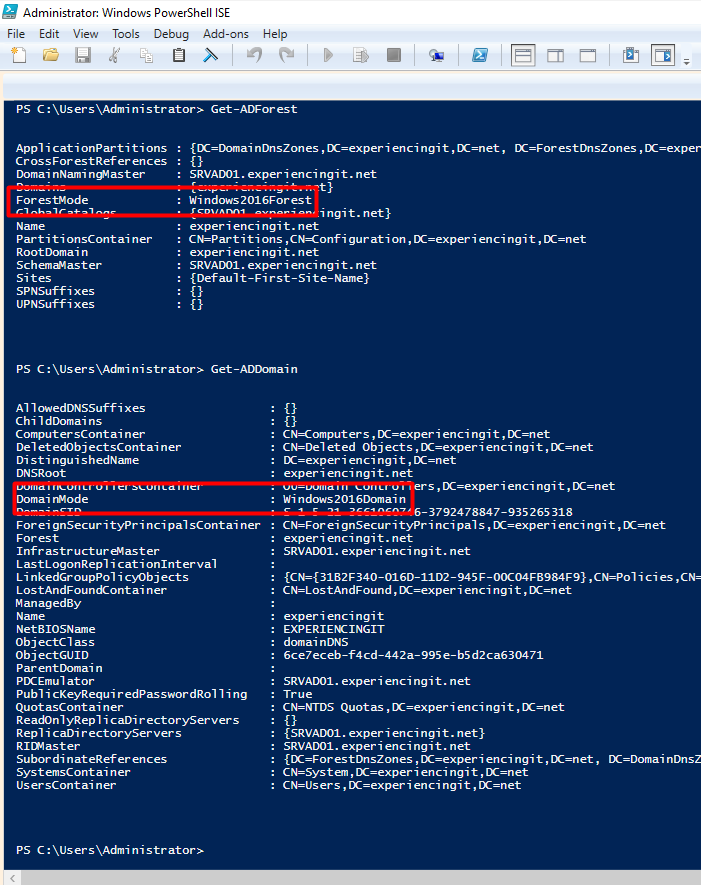
After reboot, open a Powershell window and run Get-ADForest and Get-ADDomain. The forest mode and domain mode should be set to Windows 2016, as shown below:
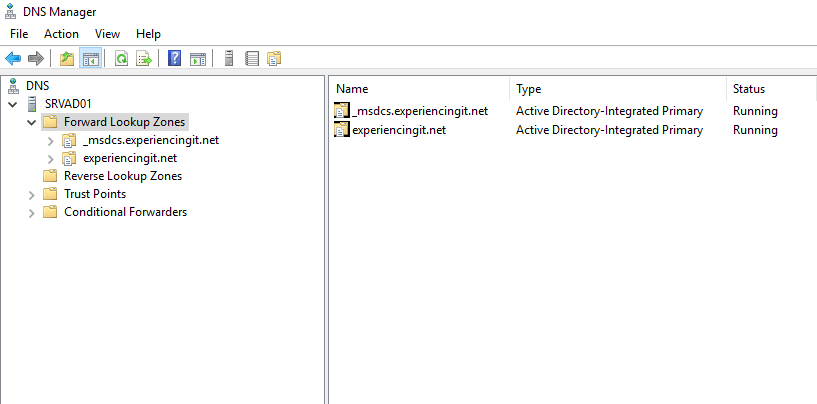
Open the DNS Manager console and it is possible to observe that a new zone has been created:
And that’s it. The ADDS role is installed and ready to be used!
As always, if you found this article useful, share it with your friends.
If you have any question or suggestion, leave your comment.
Thank you for reading!




Pingback:Install ADDS on Windows Server 2016 using Server Manager – ExperiencingIT