Add Bluetooth to your old stereo using a Raspberry Pi
Introduction
Hi Everyone! Today I’m showing you how to add Bluetooth to your old stereo or Hi-Fi system using a Raspberry Pi and very neat piece of software called balenaSound so that you can stream your music to your old Hi-Fi from virtually any device with Bluetooth!
Let’s go!
Required hardware
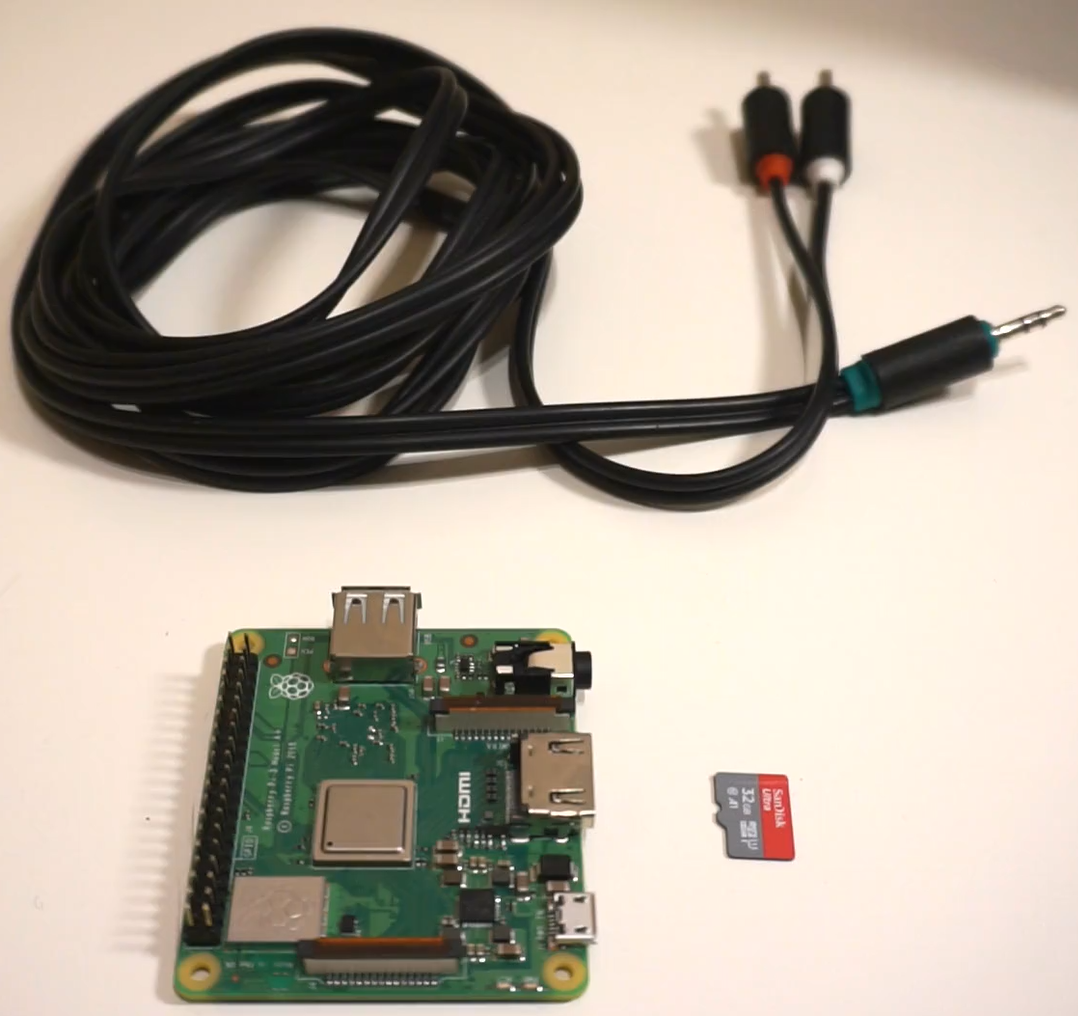
For this project you’ll need a Raspberry Pi with Bluetooth. This means you need to get a Raspberry Pi model 3 or above.
The one I got here is a Raspberry Pi model 3 A+, which is a compact model with WiFi and Bluetooth but no Ethernet.
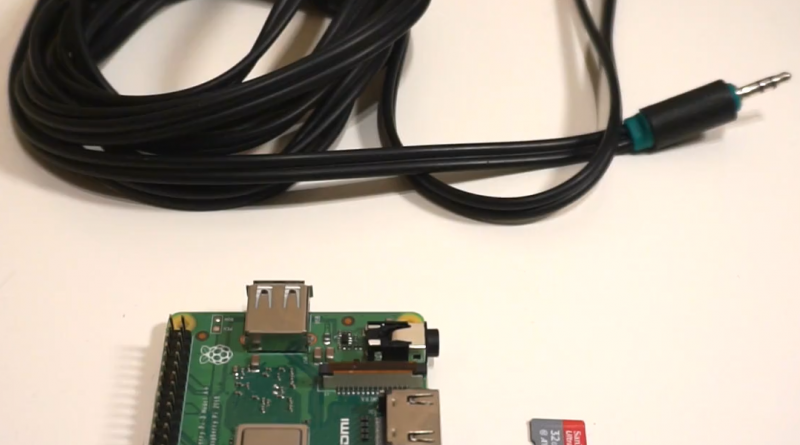
You will also need a micro-SD card, like the one shown below and a 3.5 mm jack to RCA adapter audio cable. And, of course, your old stereo!
Register with balenaCloud
Now, the first thing you need to do is to create an account with balenaCloud. It’s free. All in this tutorial is free, except for the hardware.
To do that head off to their website at https://dashboard.balena-cloud.com/login and click on the Sign up link.
Create an application with balenaCloud
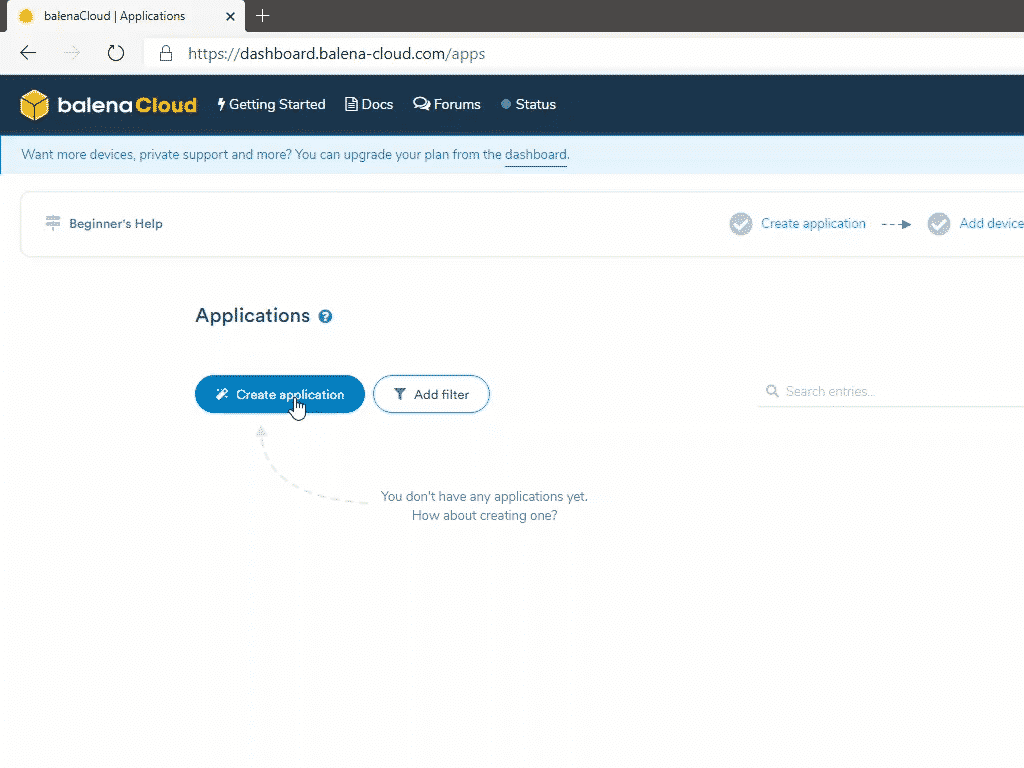
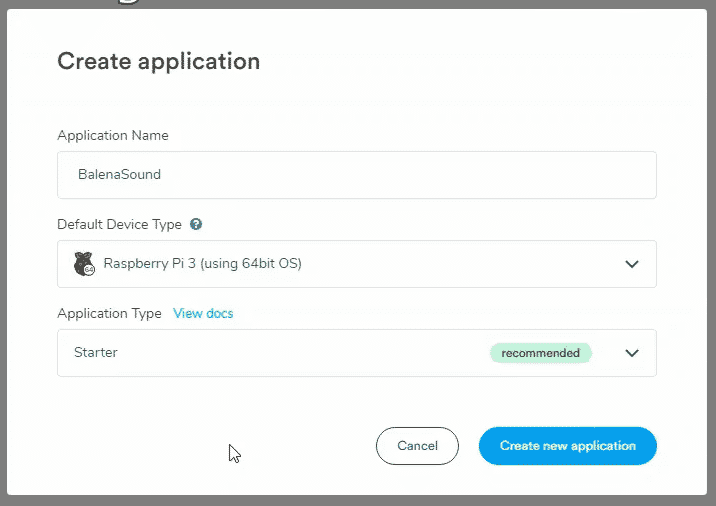
After you signed up, from the balenaCloud dashboard, click on Create application.
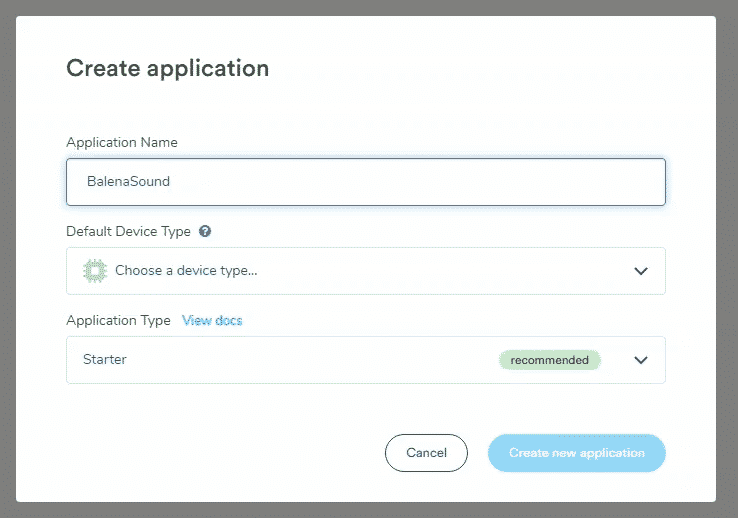
Give the application a name. I’ll name it BalenaSound.
Choose the Device type, which, in my case, will be Raspberry Pi 3 with the 64 bit option.
If, in the end, you face any issues using a 64 bit device type, choose instead the regular 32 bit device type.
The application type leave it as default and click “Create new application”.
Add a device and download balenaOS
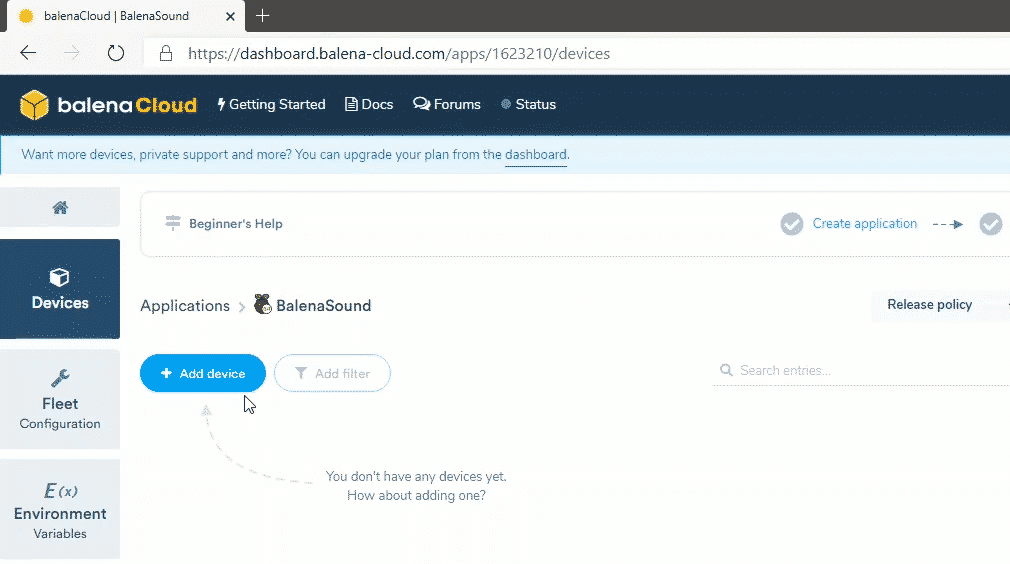
From the application screen click on add device.
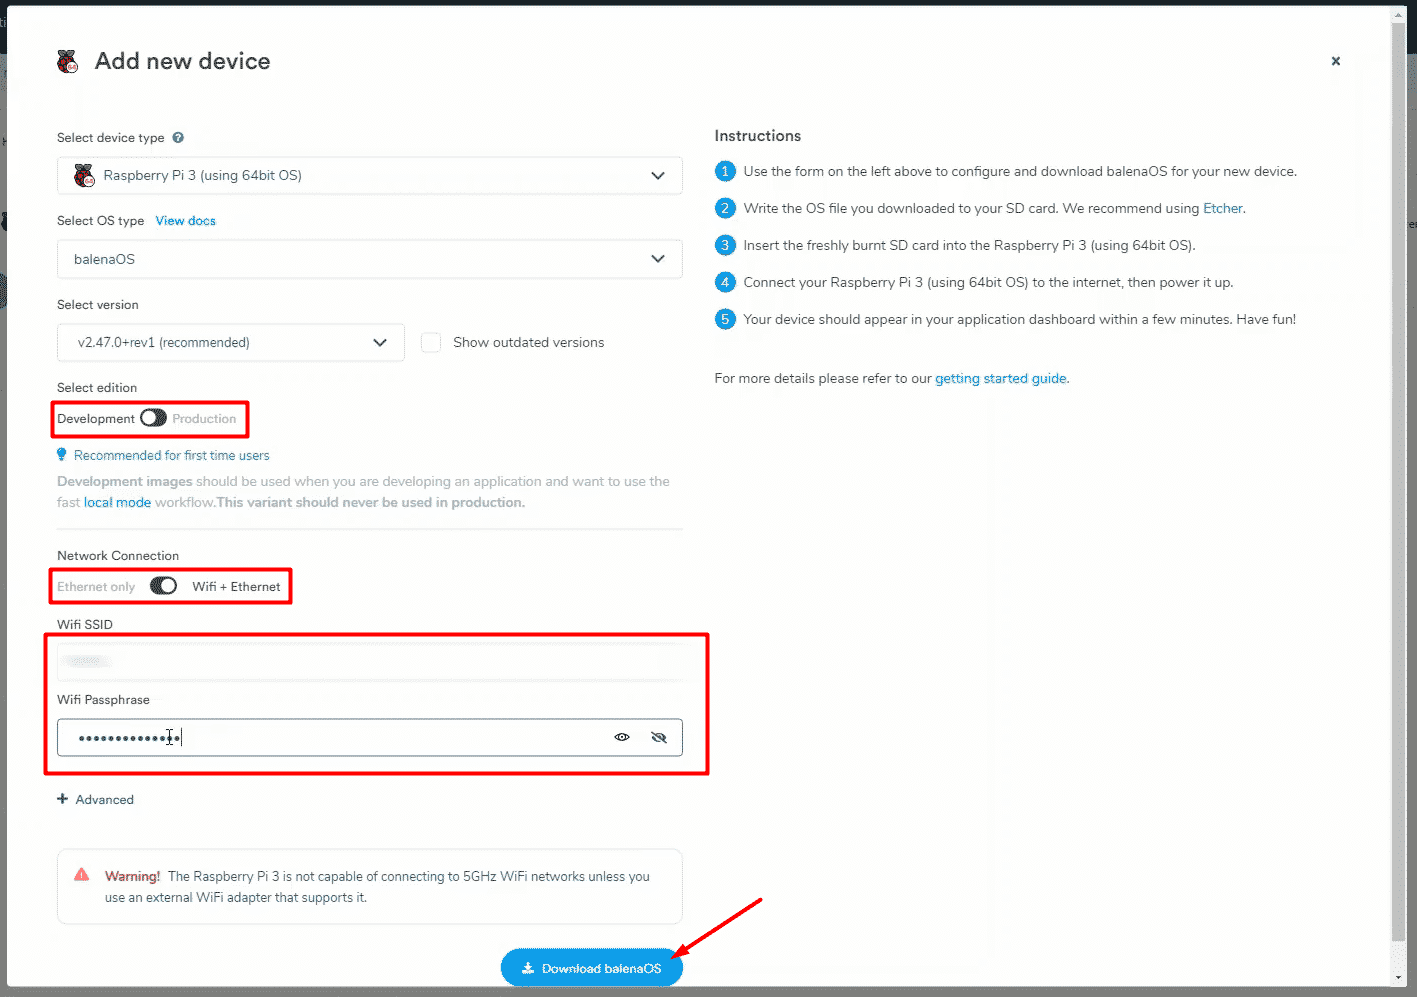
You’ll see that almost all is filled up, just turn the switch to development and choose WiFi plus Ethernet.
Insert the WiFi SSID and your WiFi passphrase and click the Download balenaOS button.
Flash the SD Card
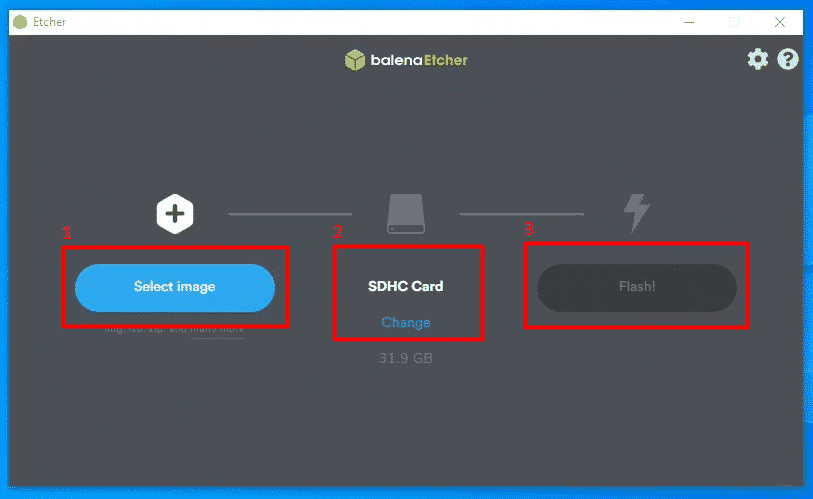
Download and install BalenaEtcher from https://www.balena.io/etcher/.
- Browse for the balenaOS image downloaded before
- Select the target SD
- Click “Flash” to burn the SD with the balenaOS image
Booting the Raspberry Pi
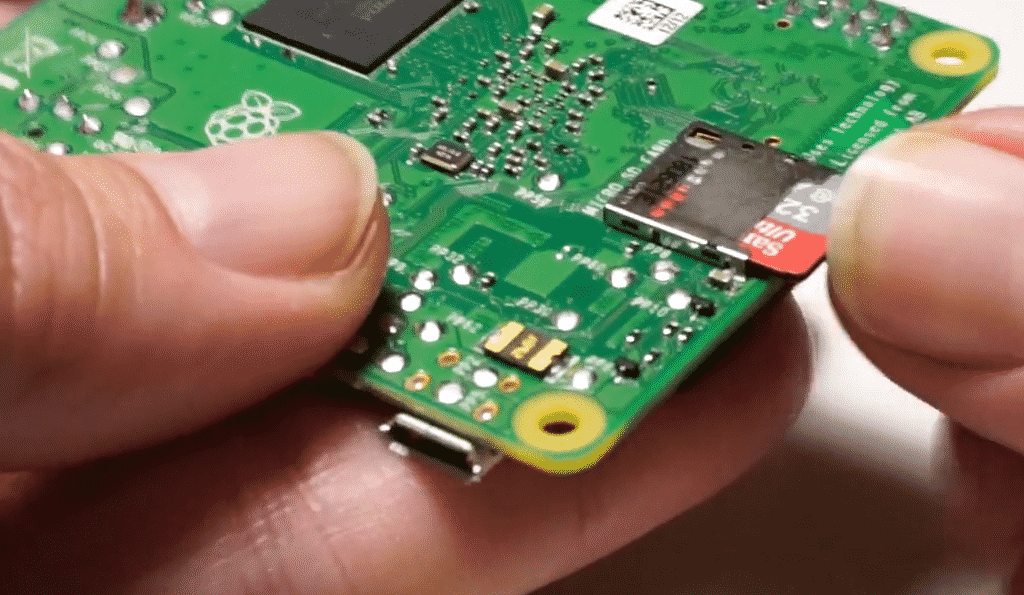
Insert the SD card into the slot on the back of the raspberry pi and plug in the power adapter.
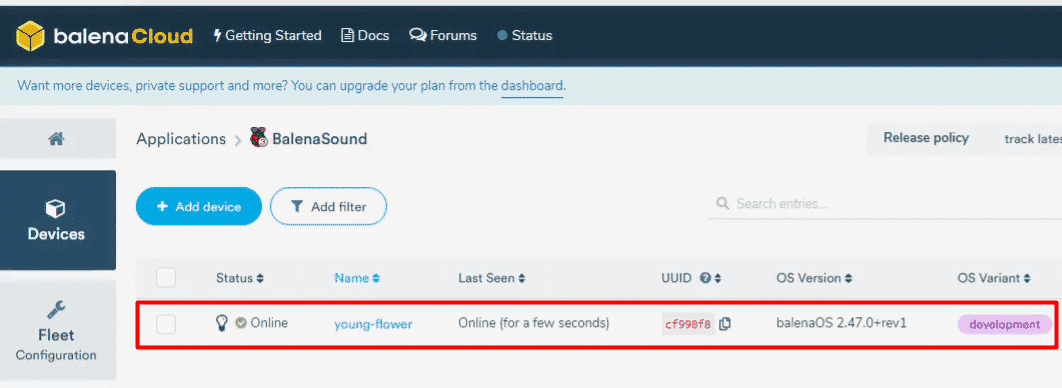
Now login to your balenaCloud console and after a few minutes your raspberry pi should should be listed.
Download and install balenaCLI
To push the balenaSound application to the Raspberry Pi we need to download and install the balenaCli.
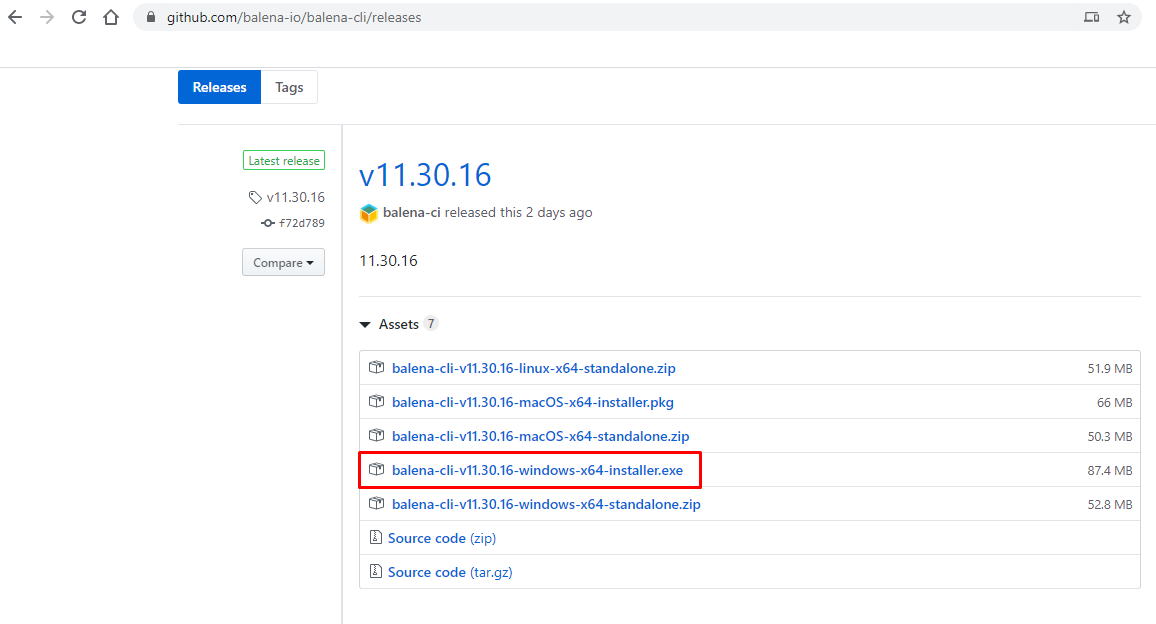
Navigate to https://github.com/balena-io/balena-cli/releases
Scroll down to assets and download the version corresponding to your system. In my case, it is the Windows x64 installer.
To install the Balena CLI, once again, on Windows, run the Windows executable . On other systems you would have to refer to the specific installation instructions.
Download balenaSound
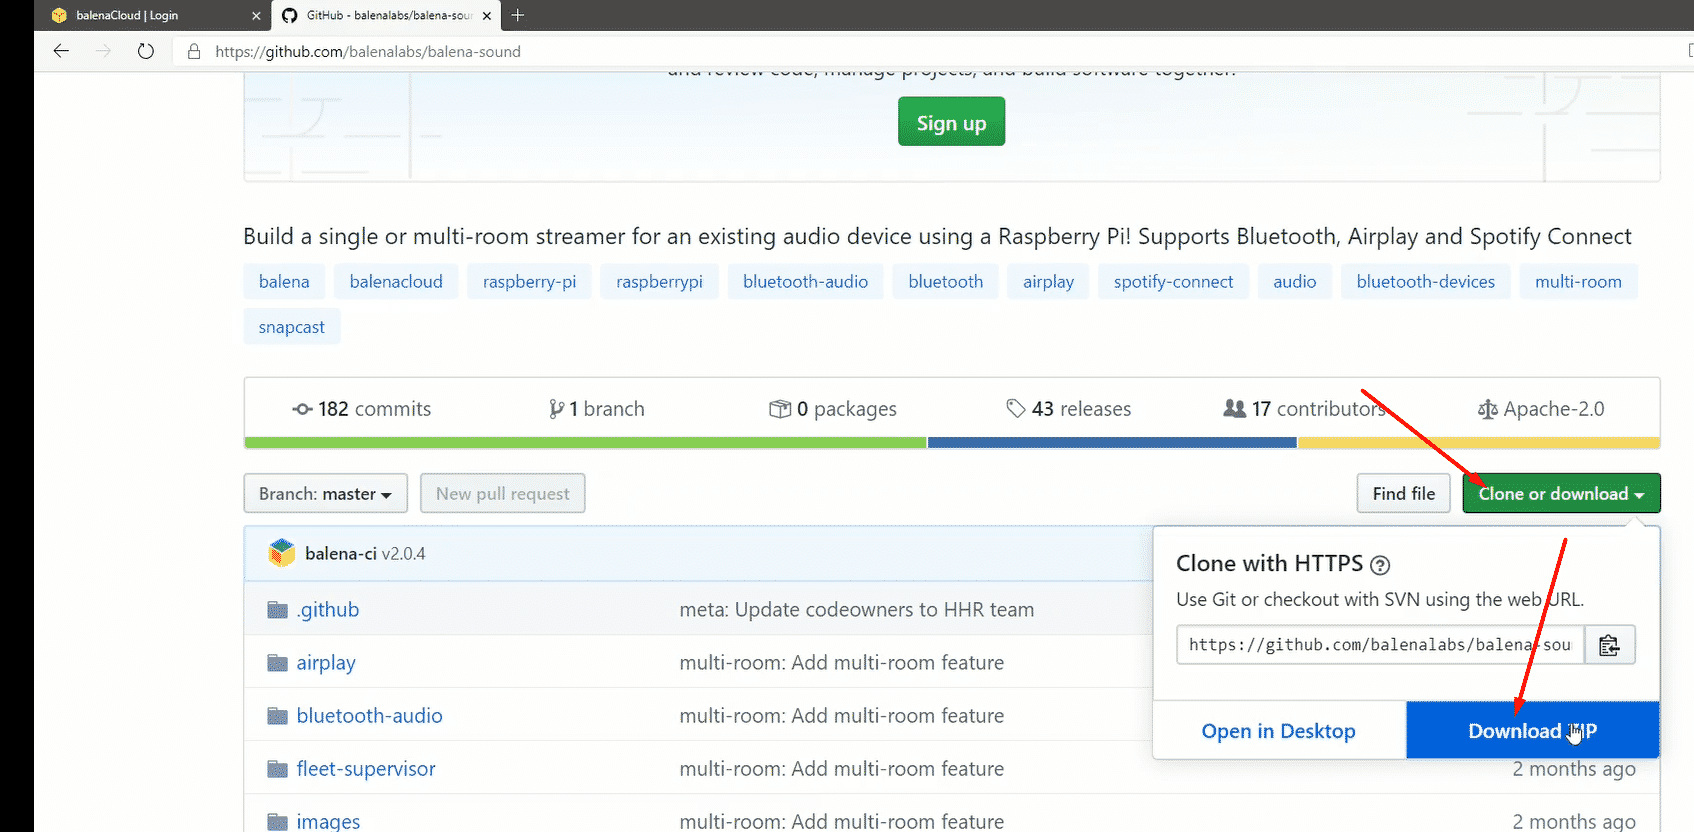
To download balenaSound navigate to https://github.com/balenalabs/balena-sound. Scroll down and click on the green download button and then on “Download ZIP”. Extract it to your downloads folder.
Push balenaSound to the Raspberry Pi
Open a command prompt and navigate to the folder where you have downloaded the balenaSound application to.
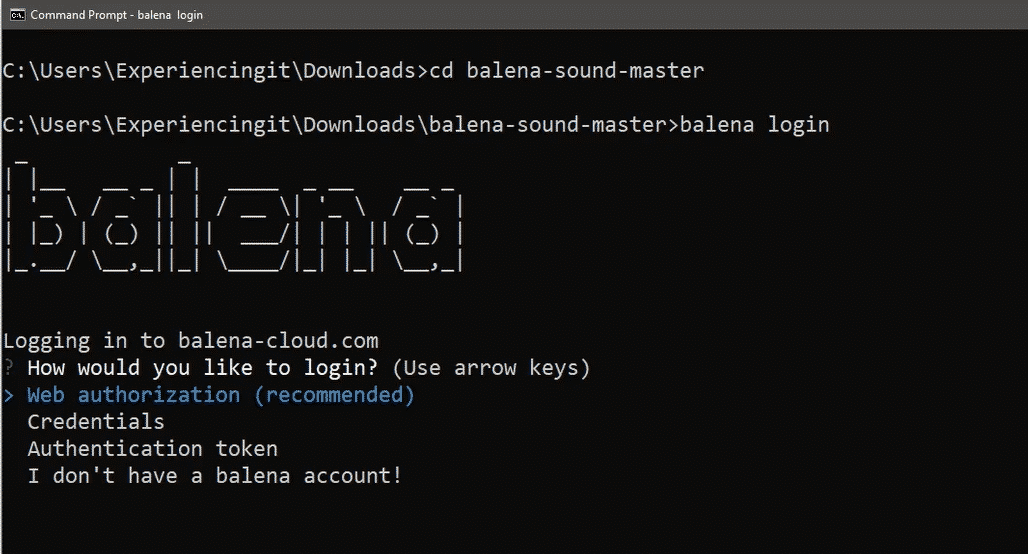
Type in balena login to authenticate with your balenaCloud dashboard. Press enter to choose the default authentication method: Web authorization
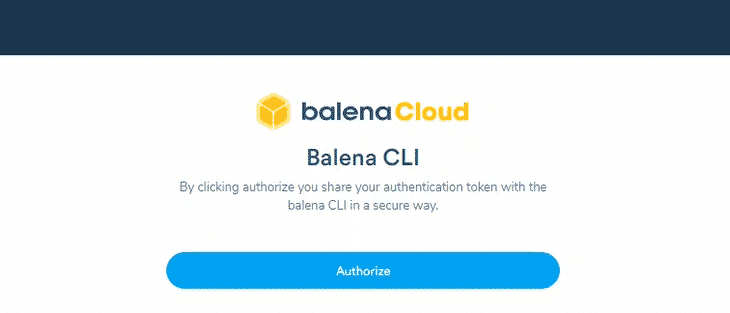
Once the following prompt pops-up, click on Authorize.
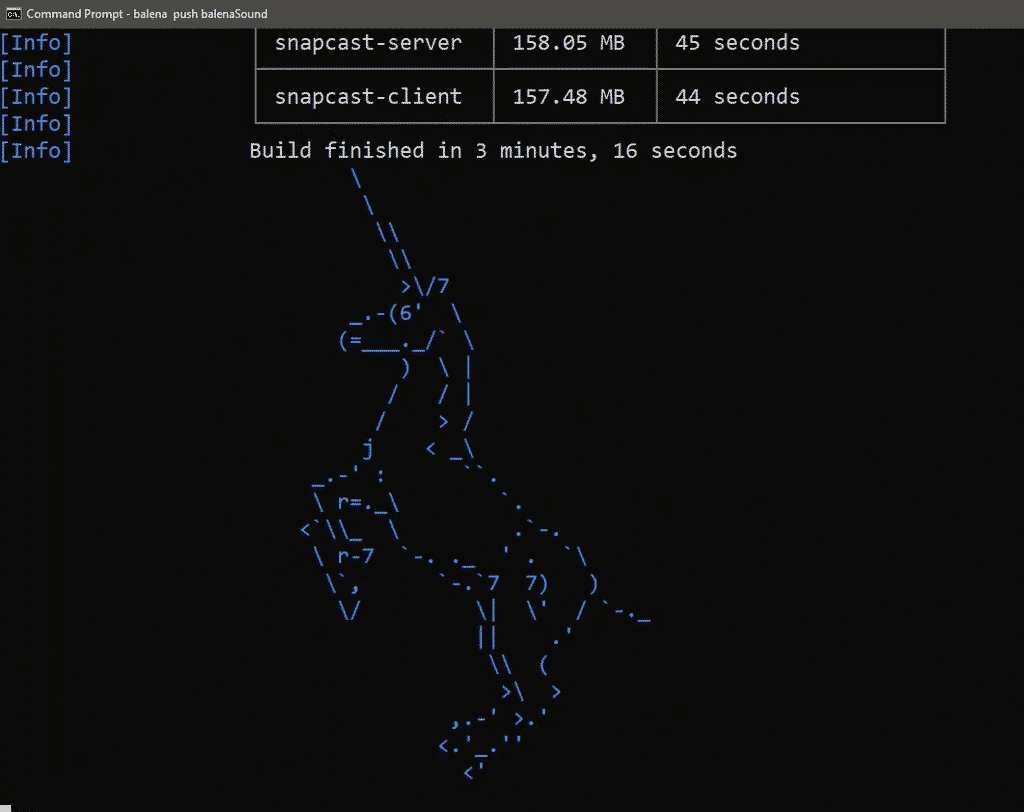
Once you’re authorized, it’s time to push the application to the raspberry pi. Back on the cmd console type balena push balenaSound and press enter.
Wait for the unicorn! Or Charlie, as the application developers call it.
Plug the cables and check if it is working
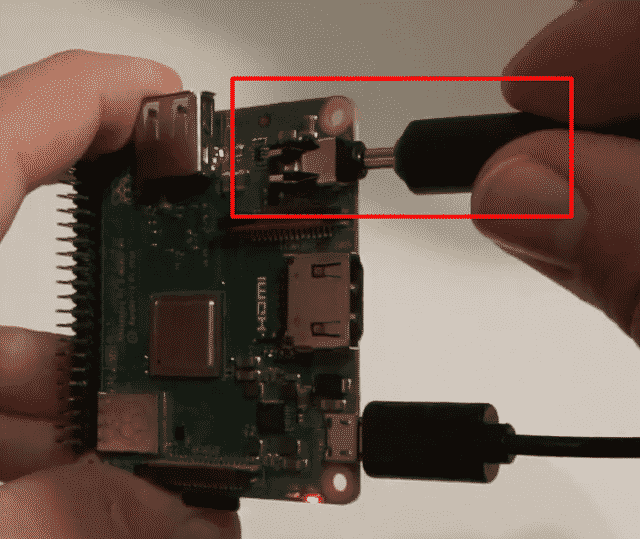
Plug the 3.5mm audio jack plug to the audio jack socket on your Raspberry Pi
And plug the RCAs to your stereo amplifier.
Pairing the device with your computer (Windows)
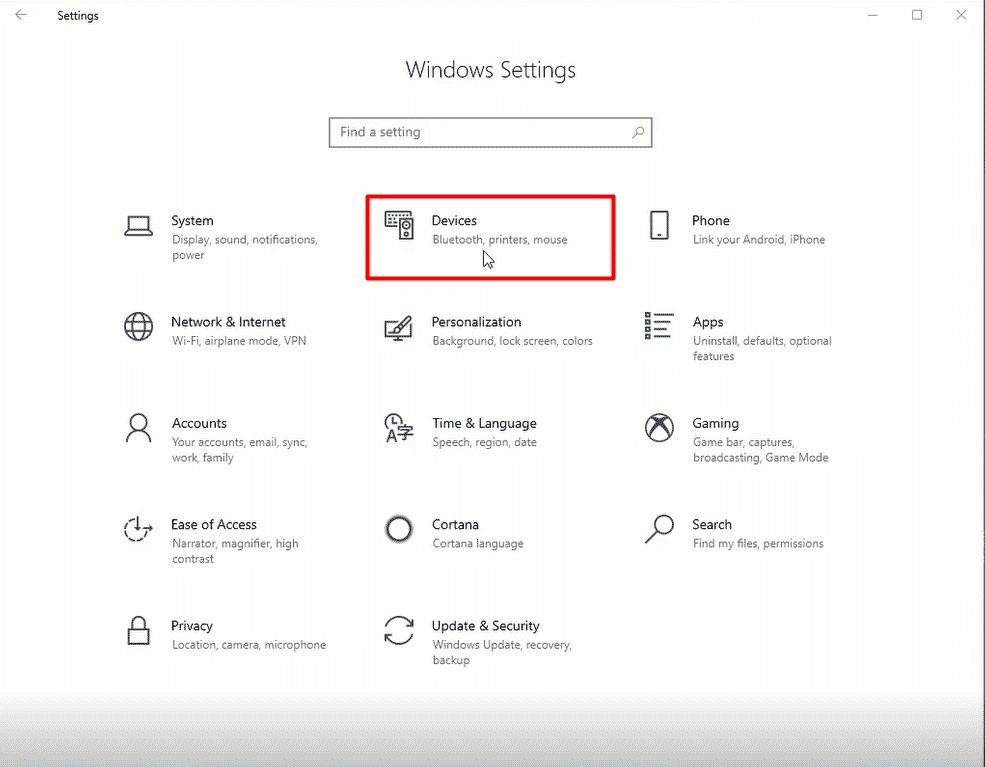
Open “Windows Settings” and click on “Devices”
Click on “Add Bluetooth or other device”.
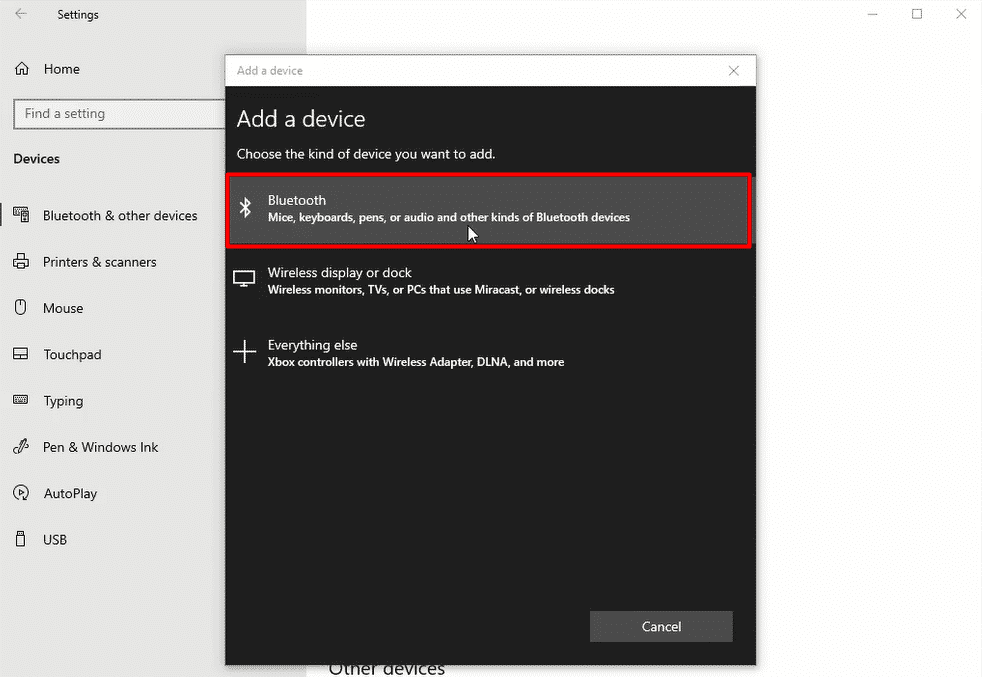
Click again on “Bluetooth”
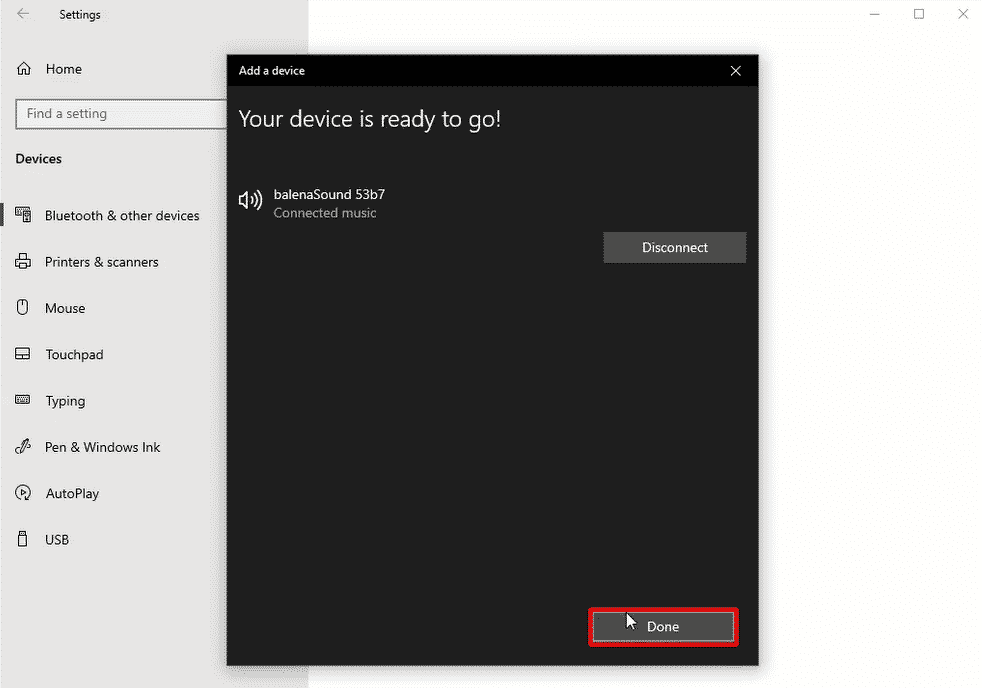
Once the device shows up in the device list, click on it to pair it with your computer.
By default the device name will always start with balenaSound and this can be later changed by adding and configuring the device variable BLUETOOTH_DEVICE_NAME
Listening!
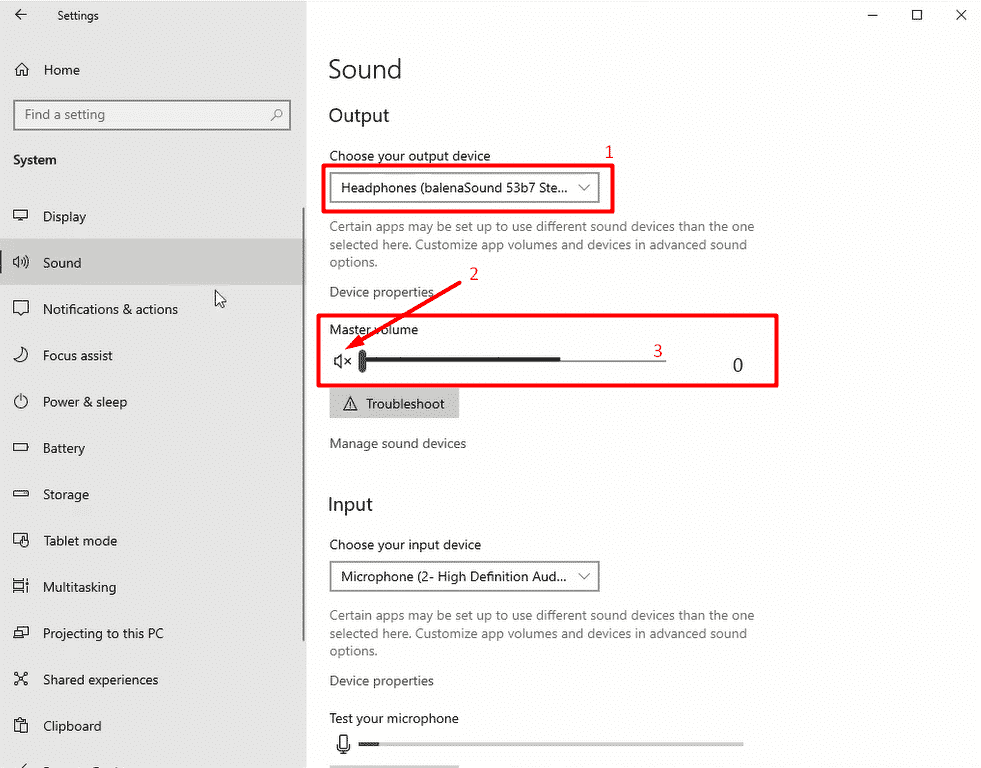
Try to play an audio or video file. If the sound is coming out from your stereo system, you’re good! If not, open again Windows Settings -> System -> Sound and (1) make sure the device is selected, (2) make sure is not muted and (3) that the volume is high enough. Even so, if you have no sound check the next section – troubleshooting.
Troubleshooting
If you don’t hear any sound at all – actually this happened to me – add the following device environment variables to your system:
DISABLE_MULTI_ROOM = 1
SYSTEM_OUTPUT_VOLUME = 100
Adding these variables solved the issue I had with having no sound.
To add these variables please refer to the balenaCloud documentation at https://www.balena.io/docs/learn/manage/serv-vars/#device-environment-and-service-variables
Video
You can also watch the whole process on Youtube. Just click on the video below.
As always, if you found this article useful, share it with your friends.
If you have any questions or suggestions, leave your comment.
Thank you for reading!


