Install Raspbian Lite on the Raspberry Pi 3 B+
Introduction
In this article I will be describing how to install the lite version of Raspbian on the Raspberry Pi. Raspbian is a free operating system based on Debian optimized for the Raspberry Pi and you can download it following the link in the “Let’s Start” section below. The model used is a Raspberry Pi 3 B+, but it should work with any other Raspberry Pi model.
Let’s Start!
First of all, head to the Raspbian downloads page and download the latest version available. At the time of writing it was “Raspbian Stretch Lite”. Download and install these two other tools:
Please note that I am performing all operation on a Windows machine, so all downloads are for Windows. If you are using Linux or Mac you’ll have to find these tools counterparts for Linux or Mac.
Choosing the SD card
If you don’t have an available SD card, please take a look at the SD card recommendations by the Raspberry Pi Foundation.
Note that some SD cards might suffer from data corruption over time. I’ve experienced it with some Kingston SD cards and that’s why, for some time now, I am very happily using SanDisk Ultra SD cards! I recommend the 8GB card, for a lite installation like the one I’ll be doing in this article, or the 16GB or 32GB cards if you want to do a full installation, i.e., with a desktop environment and full application load.
Preparing the SD card
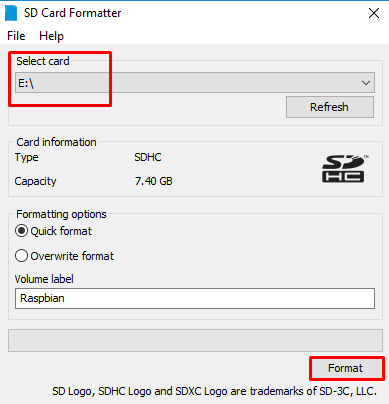
Insert the SD card in your computer SD card reader and make note of the drive letter assigned to it by Windows. Note that I will not be responsible if you chose the wrong device and lose all your data! In my case it was drive E:. Open “SD Formatter” and make sure the selected card is your SD card drive’s letter! Give it any Volume label you want to (mine is Raspbian) and click “Format”.
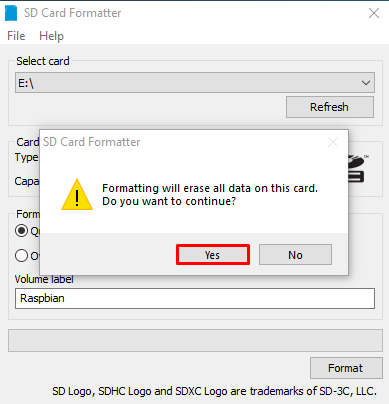
Click “Yes”
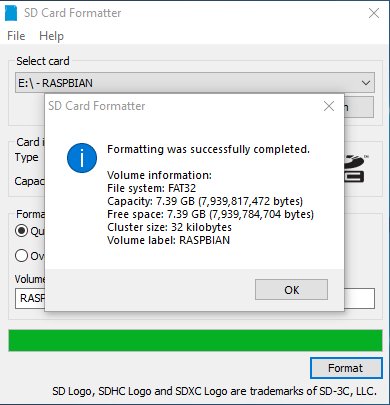
Click “OK” and close “SD Formatter”.
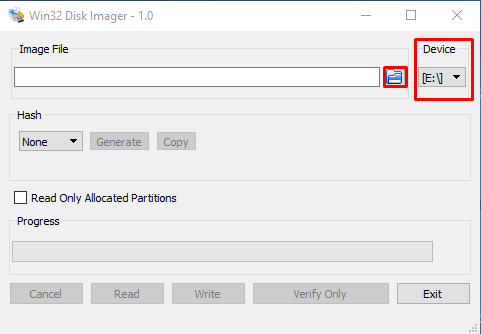
Once finished, open “Win32 Disk Imager”. Select the Raspbian image to burn onto the SD card by clicking the little blue folder highlighted below and, once again, make sure the selected driver letter is the one corresponding to your SD card.
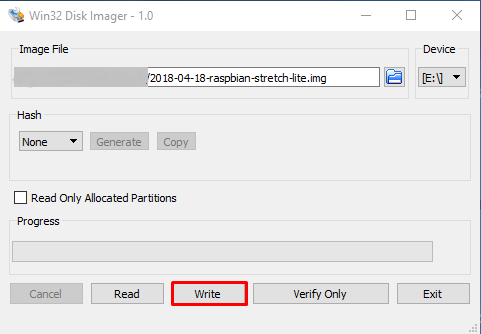
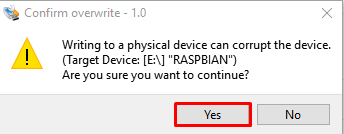
Click “Write” and “Yes”at the warning message and the Raspbian image will be transferred to the SD card.
Booting the Raspberry Pi!
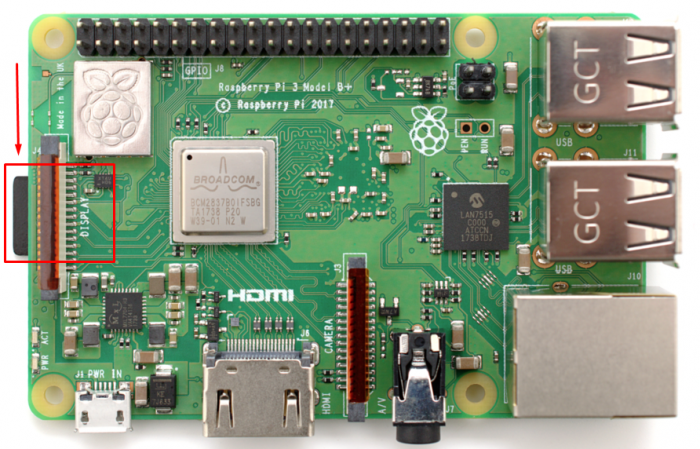
Insert the SD card into the Raspberry Pi SD card slot, which is found underneath the display interface.
Plug the Raspberry Pi to your monitor or TV, make sure you also plug a keyboard and you’re ready to go! Plug the power adapter to the Pi’s micro-usb port and it should start booting. If you do not have a Raspberry Pi certified power adapter, a regular mobile charger should do the trick (click here for Raspberry Pi’s power requirements)! If you’d like to buy a verified power adapter, I’ll leave some links at the end of this article.
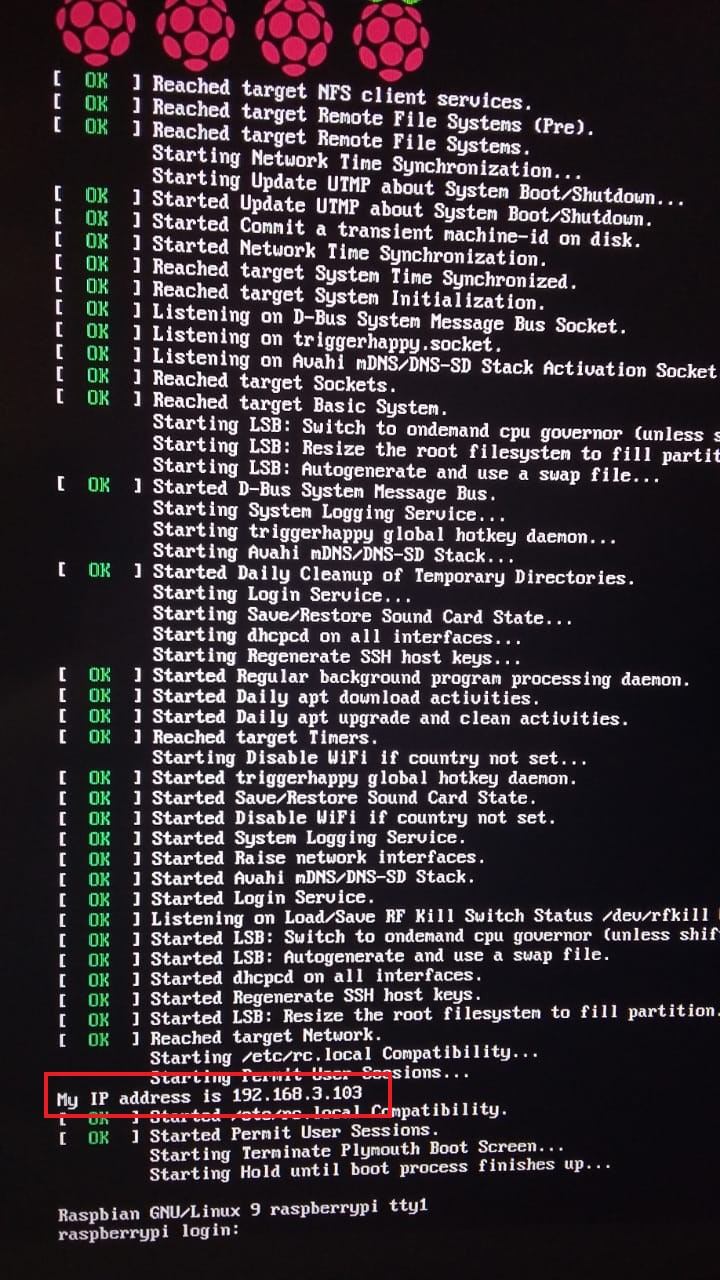
This is what you should be seeing on your TV/Monitor:
At each boot the Raspberry Pi let us know which IP address it is using. We’ll use that information to connect remotely to it using SSH. To achieve that, and if you are using the latest Windows 10 update (May 2018), just open a Windows command prompt and type
| ssh [IP address of the Raspberry Pi] -l username |
If you are not using the last version of Windows 10, you can download and install Putty. As you can see below, it is not possible to connect to the Pi just yet, because the SSH Server on the Pi comes disabled by default. So, let’s enable it!
Enabling SSH
First of all, sorry for the low quality images below as they were taken using my phone’s camera.
To enable SSH, login to your Raspberry Pi using the default username “pi” and default password “raspberry” and start the “Raspberry Pi Software Configuration Tool” by typing
| sudo raspi-config |
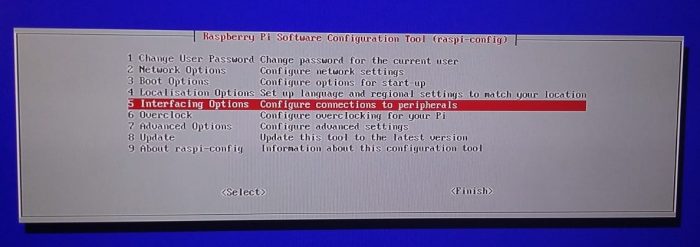
Choose option number 5, “Interfacing Options” and press Enter on your keyboard.
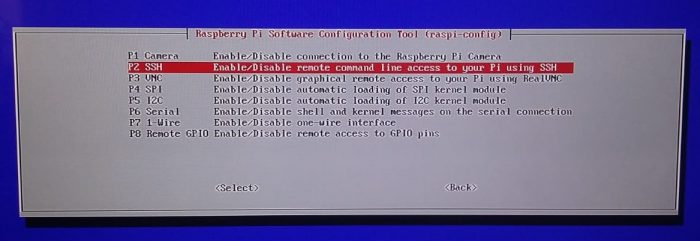
Now choose option 2, “SSH” and press Enter.
Select “Yes” and press Enter.
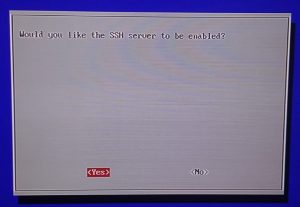
At the next message, press “OK” and leave the “Raspberry Pi Software Configuration Tool” by pressing “Finish”.
Reboot the Raspberry Pi issuing the command
| sudo reboot |

After rebooting it is possible to connect using SSH.

Now that we are able to connect to the Raspberry Pi using SSH, it is now time to update it!
Updating the Raspberry Pi
Using the previously opened SSH session, type
| sudo apt update |
This will update the Raspbian software sources repositories to their latest versions.

After upgrading the repositories it is time to update the OS. Type
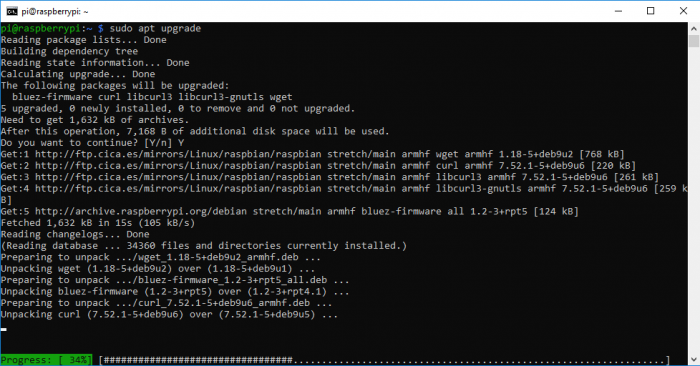
| sudo apt upgrade |
and press enter. Type “Y” to confirm the updates download.

Once it will start to work you’ll see a progress bar for each package being updated.
And that’s it! This concludes this small tutorial on how to install Raspbian Lite on a Raspberry Pi. I hope to be able to deliver more content on the Raspberry Pi soon! Stay tuned!
Below I’ll leave you some links to where you can buy all the hardware that was used during the writing of this article. Please note that all links are sponsored, meaning that buying from one of the links below will help me maintain the website alive and also deliver more content with better quality. Thank you!
Raspberry Pi 3 b+ Kit (recommended) – Click here
SD Card (recommended) – Click here
Raspberry Pi 3 B+ – Click here
Raspberry Pi 3 B+ recommended power supply – Click here
As always, if you found this article useful, share it with your friends.
If you have any questions or suggestions, please leave your comment.
And… Thank you for reading!


