SCCM Current Branch – Add Reporting Services Point Role
Introduction
In this article I will install the SCCM Current Branch Reporting Services Point role. The SCCM Reporting Services Point role will allow you to manage reports in Configuration Manager. The role must be configured on a server with Microsoft SQL Server Reporting Services installed and running. In the following section I will detail the prerequisites before installing the role.
Please note that I’m specifying SQL Server 2016 because it is the version I installed in my SCCM laboratory. If you want to use SQL Server 2017, note that the SQL Server 2017 Reporting Services come as a separate download and SQL Server 2017 is only supported with a minimum of cumulative update version 2, beginning with Configuration Manager version 1710.
Prerequisites
Before starting you have to install SQL Server 2016 and you have to install SQL Server 2016 Reporting Services.
According to Microsoft, the prerequisites to install, or add, the SCCM Reporting Services Point role, are the following:
- SQL Server Reporting Services. Read How to Install SQL Server 2016 Reporting Services.
- Site system role dependencies for the computers that run the reporting services point. Read about it here.
These are the two main prerequisites. Refer to the article Prerequisites for reporting in System Center Configuration Manager on Microsoft Docs for more information.
Add SCCM Current Branch Reporting Services point
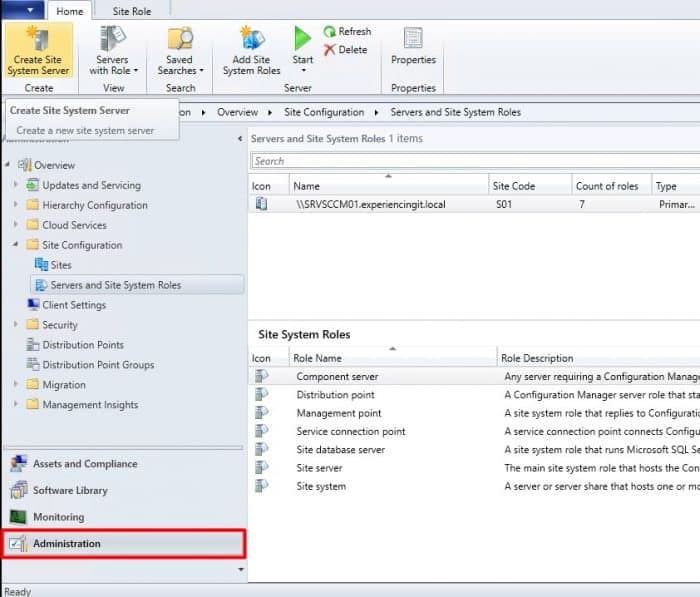
Open Systems Center Configuration Manager console and browse to “Administration“.
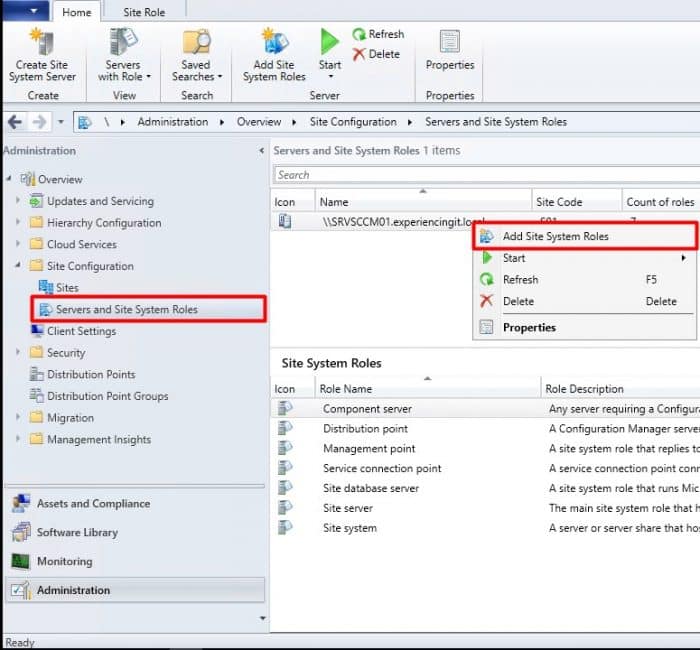
Click on “Server and Site System Roles” and right-click on the site system server where you want to install the role. Choose “Add Site System Roles“.
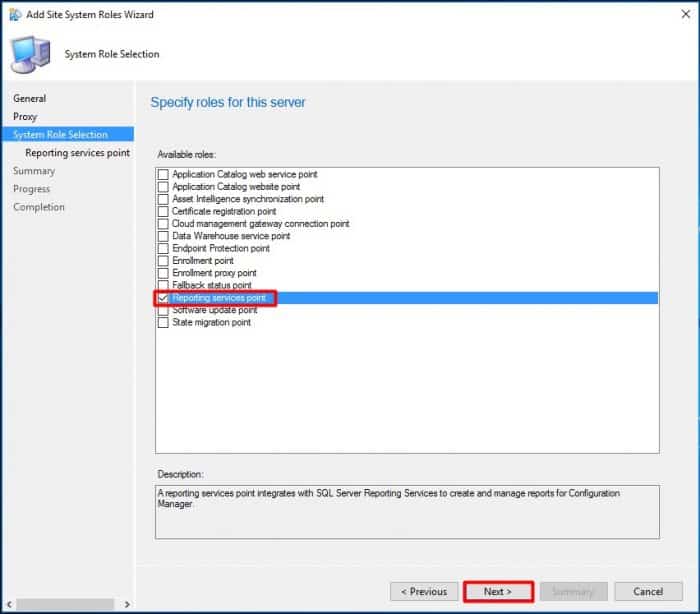
The “Add Site System Roles Wizard” window will pop-up. Click “Next” until you reach the “System Role Selection” window.
Here select “Reporting services point” and click “Next“.
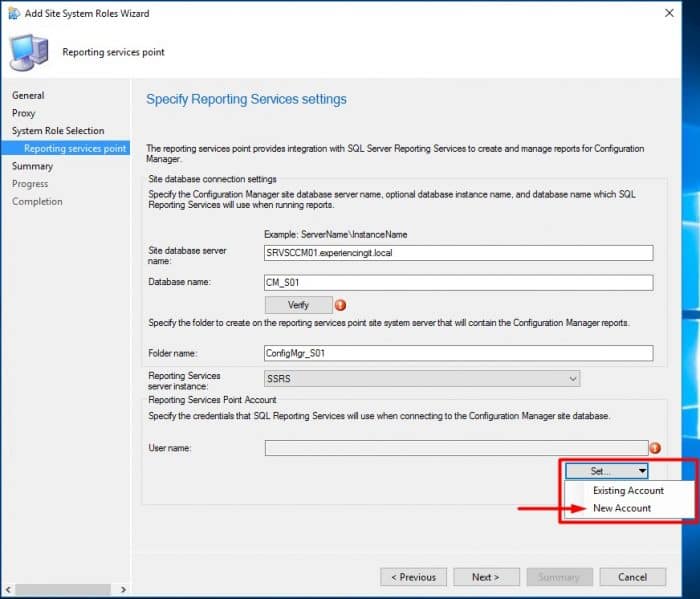
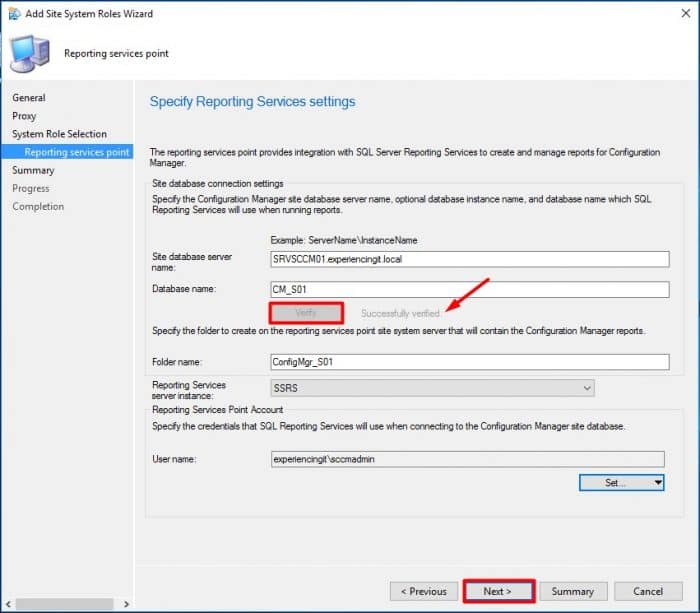
On this screen we are going to choose the account to connect to the SQL Server Reporting Services. The database name is filled automatically. Click on “Set…” and choose “New Account“.
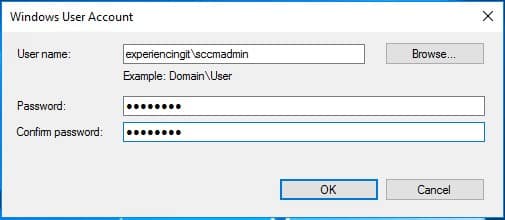
You can type the “User name” or click on the “Browse” and search for the user you want to use. Since I know my username by heart, I will type it. Enter the password and confirmation and click on “OK“. Remember that this user must have the right permissions on the database.
Back to the “Add Site System Roles Wizard” click on “Verify“. If all goes well, a “Successfully verified” grayed-out message will show up next to the Verify button. click on “Next“.
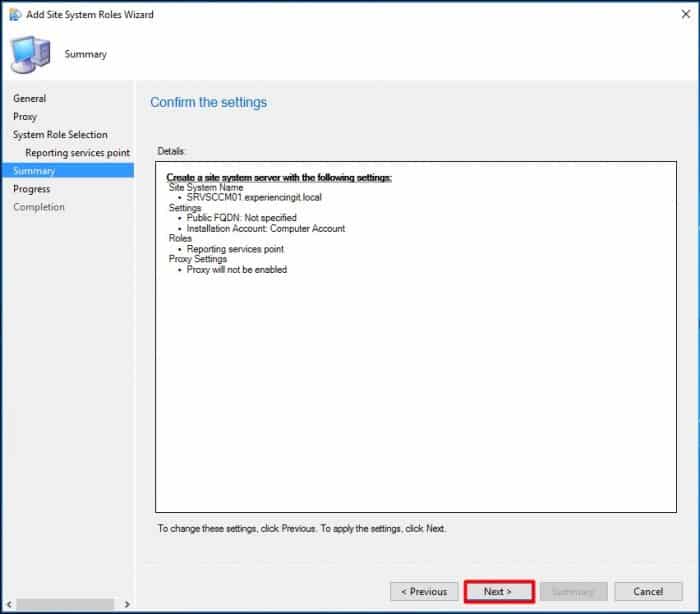
Click “Next” on the “Summary (Confirm the settings)” window and…
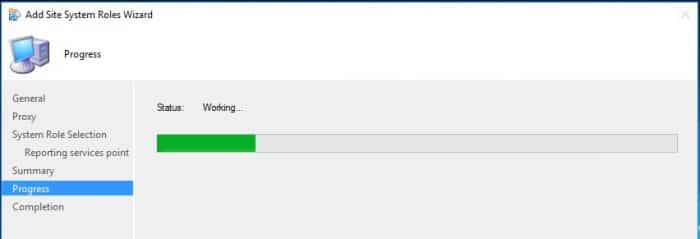
Wait for the installation to finish.
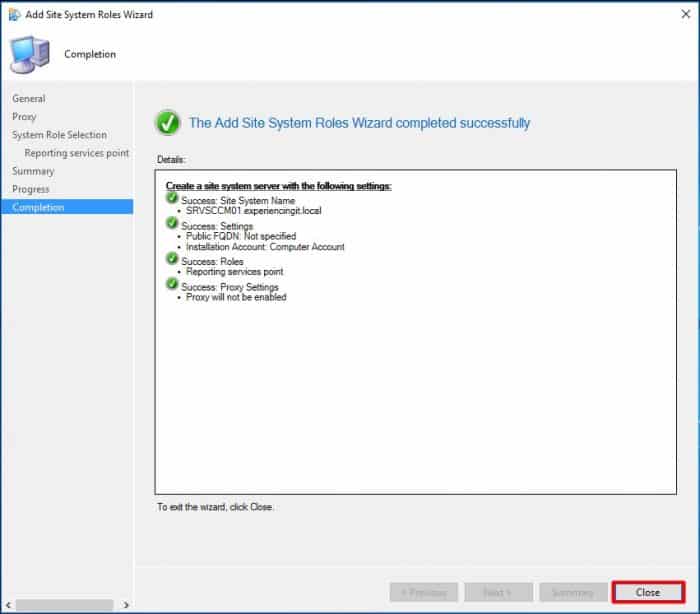
After completion click on “Close“.
Confirming
Log Files
After a successful installation let’s confirm that the role really installed properly. The first place to check is, obviously, the log files. And the log files to check are:
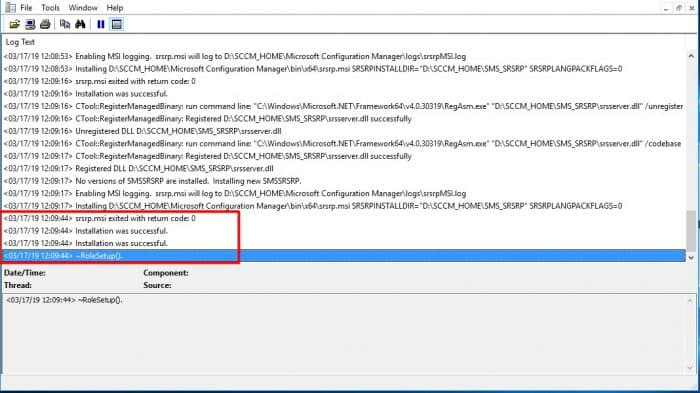
- srsrsetup.log
In this log file you’ll check if the role installed properly. You should see some lines like the ones highlighted below:
- srsrp.log
And in this log you’ll be able to monitor that reports are being deployed, security is being applied, that the Reporting Services point is properly connecting to SQL Reporting Services, etc, etc.
Visually in the SCCM console
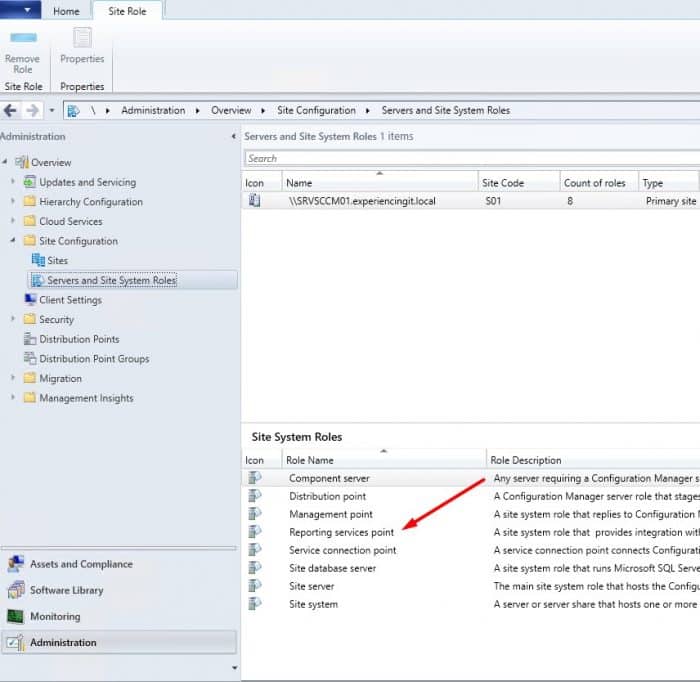
If you open the SCCM Console, you’ll see that we have another role in “Site System Roles” list, under the site system server on which we installed the role.
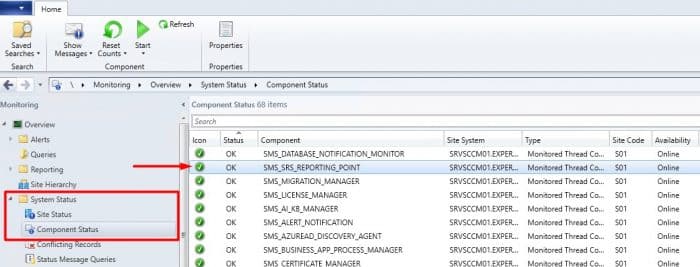
If you go to the “Monitoring” section, expand “System Status” and browse the section “Component Status“, you’ll find a new component SMS_SRS_REPORTING_POINT, like the image below. It should be online and green.
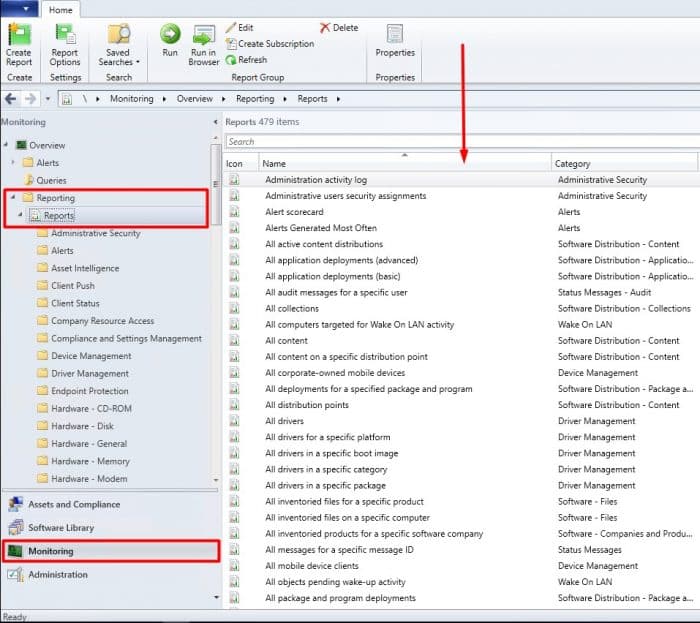
Now expand “Reporting” and click on “Reports“, you’ll see that you’ll have a list of available reports on the right hand side of the window.
Final configurations
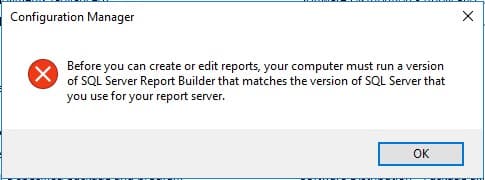
After confirming that the role is installed properly, if you try to add a new report, you might get the following message (Before you can create or edit reports, your computer must run a version of SQL Server Report Builder that matches the version of SQL that you use for your report server.):
So, to get rid of this message, I followed these two steps:
- Follow the instructions here and here, to configure reporting to use Report Builder 3.0. Maybe I didn’t need to follow these steps but as it was what I tried in the first place, before installing Report Builder 2016, I just let it be as it is. Try to install Report Builder 2016 first and see how it goes.
- Install SQL Server Report Builder 2016. You can download it from here: https://www.microsoft.com/en-us/download/details.aspx?id=53613.
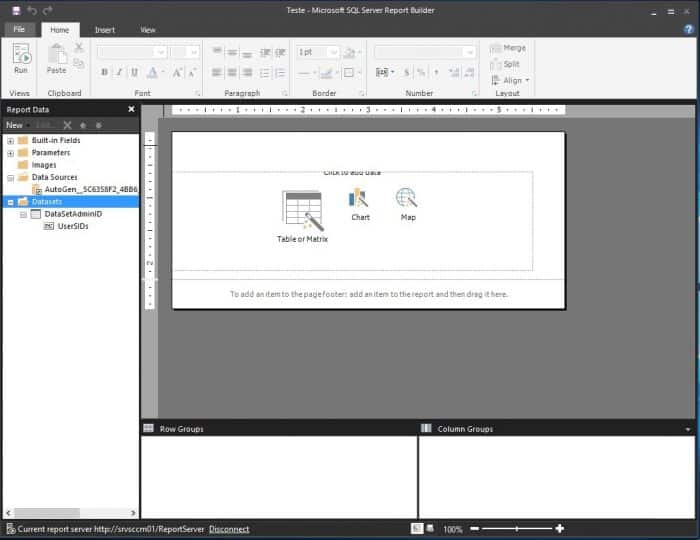
After following the steps above, voilá, I’m able to create new reports!
So, I guess this ends this small how to on how to add the SCCM Current Branch Reporting Services Point role.
As always, if you found this article useful, share it with your friends.
If you have any questions or suggestions, leave your comment.
Thank you for reading!




Pingback:Install SQL Server 2016 Reporting Services - ExperiencingIT
Pingback:SCCM Current Branch Installation Guide & More - ExperiencingIT
Thanks for the Reporting Services How To.
When at Specify Reporting Services Settings, I enter a specific domain account, but when “Verify” is run, it fails and the error shows my domain account as the failed account.
I have already removed Reporting Services Config Manager and deleted the created databse once.
Second attempt getting same failed error with my user name.
Should adding the Reporting Services Point Role be installed with a local admin account?
Thanks.
Hi Vince!
Yes, install the service as a local administrator on the server. Looks like I haven’t specified that in the article, sorry.
Will update it later.
Thanks.
Regards,
Pedro