Install SCCM Current Branch – Part 7 – Prerequisites (Windows Features)
In this article I will start to lay down the foundations and will prepare the Site Server so that I will be able to install SCCM on it, later on.
| This should be done at the site server (SCCM Server) using the SCCMAdmin account created in the step two of the installation guide. |
How to prepare the Site Server for SCCM installation?
Prerequisites check
First of all, let’s run a prerequisite check. For that open a command prompt with administrative rights and let’s position ourselves at the \SMSSETUP\BIN\X64 folder of the SCCM media.
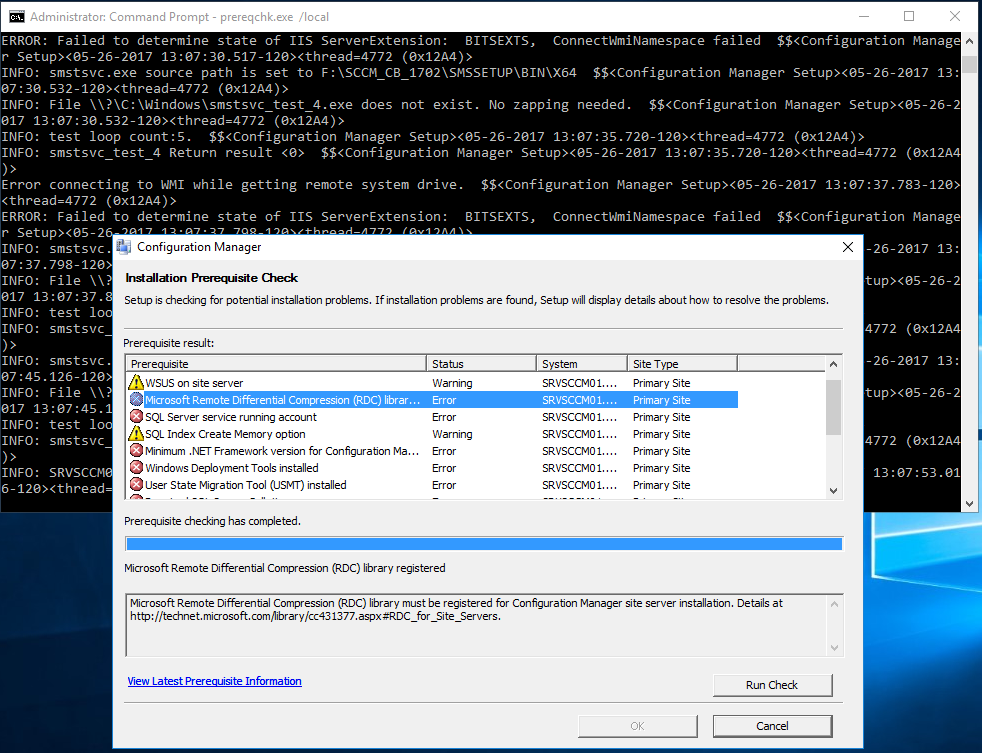
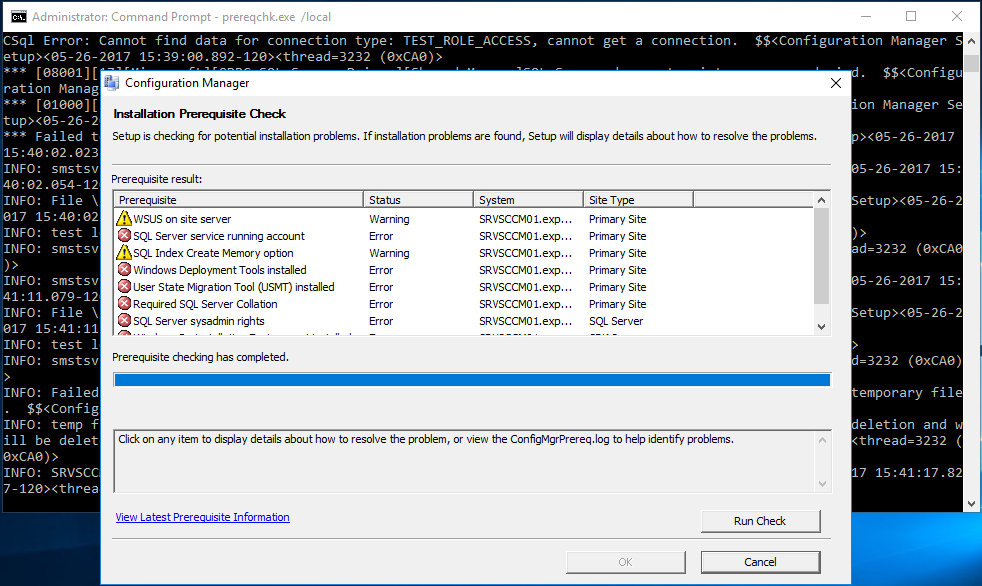
Run “prereqchk /local”. This will analyze the Site Server and check if it meets the prerequisites to install the Systems Management server.
As you can see, it will present us with a series of errors and warnings:
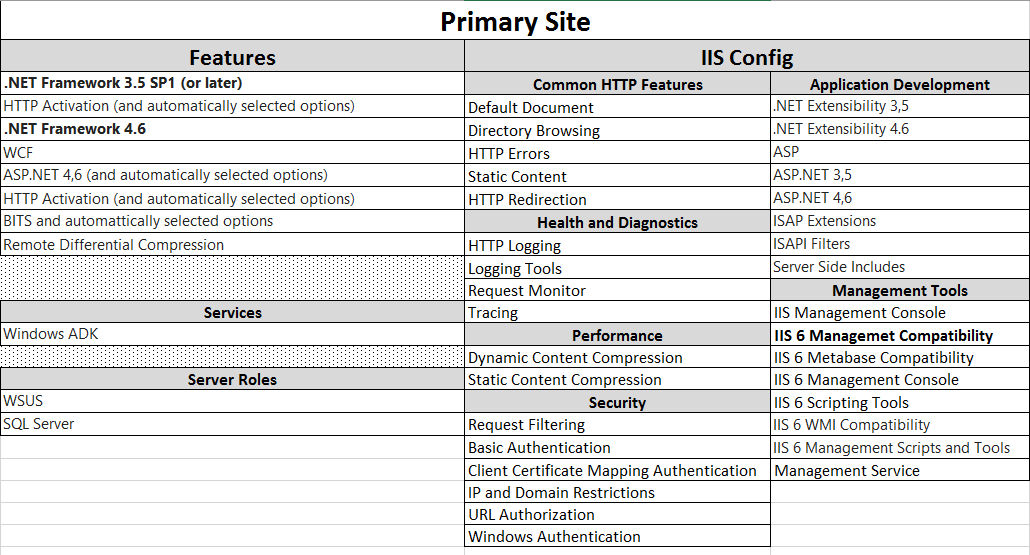
Analyzing the above output, I’ve made a table of what are the roles and features that we will need to perform the SCCM Primary Site installation.
Note that in this post I will only install the Windows features. SQL Server, WSUS and ADK I will leave for another post.
The resulting table is as follow:
These prerequisites are in line with https://docs.microsoft.com/en-us/sccm/core/plan-design/configs/site-and-site-system-prerequisites and https://docs.microsoft.com/en-us/sccm/core/get-started/set-up-your-lab.
So, let’s get to it!
Install Windows Features
First of all, open Server Manager. Select “Add roles and features” and press “Next” at the “Before you begin” screen.
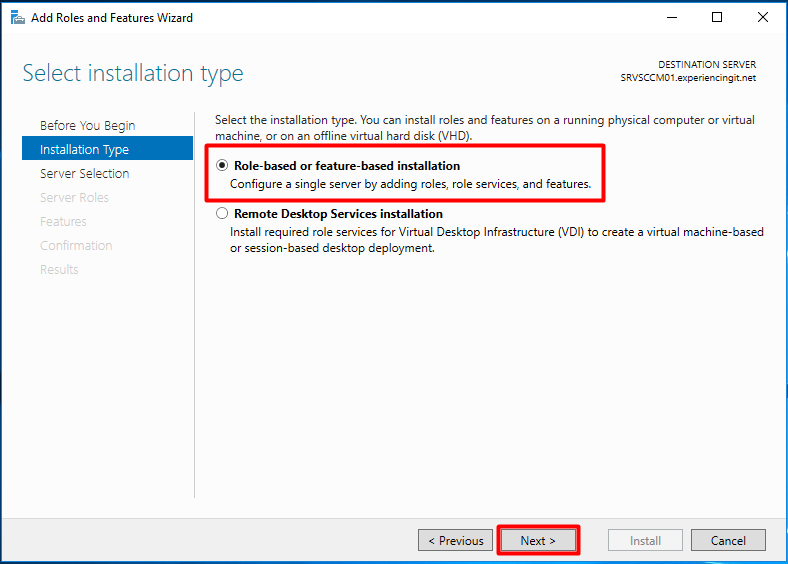
Select “Role-based or feature-based installation” and press “Next”.
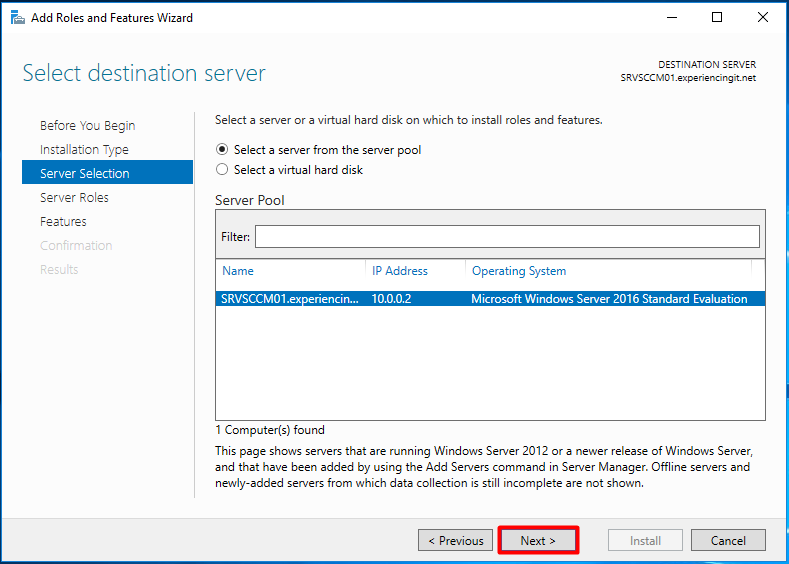
Press “Next” at the “Select destination server” screen.
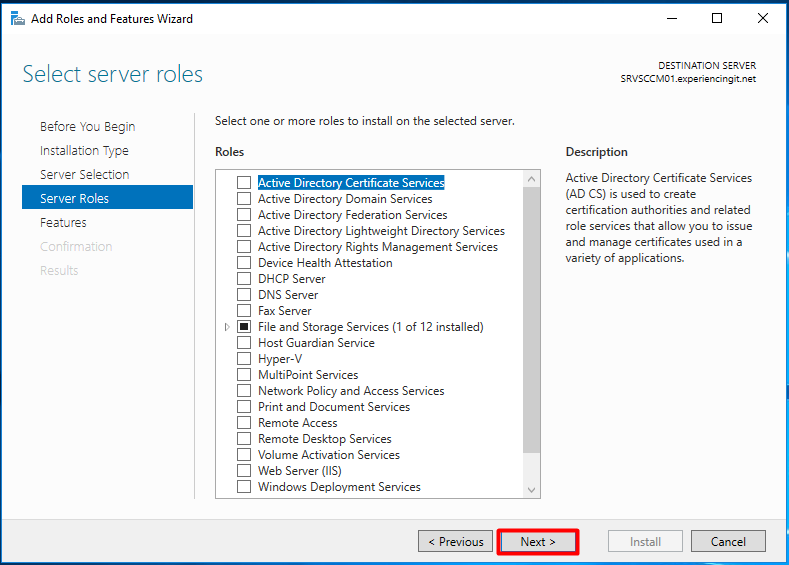
Press “Next” at the “Select server roles” screen.
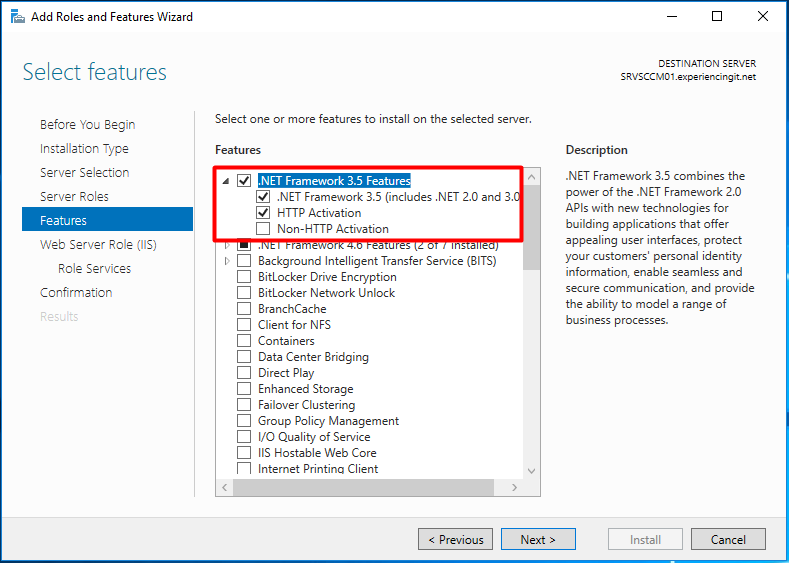
At the “Select features” screen, select and expand “.NET Framework 3.5 Features”. Select “HTTP Activation” and add all the proposed additional features required for it. It should look like this:
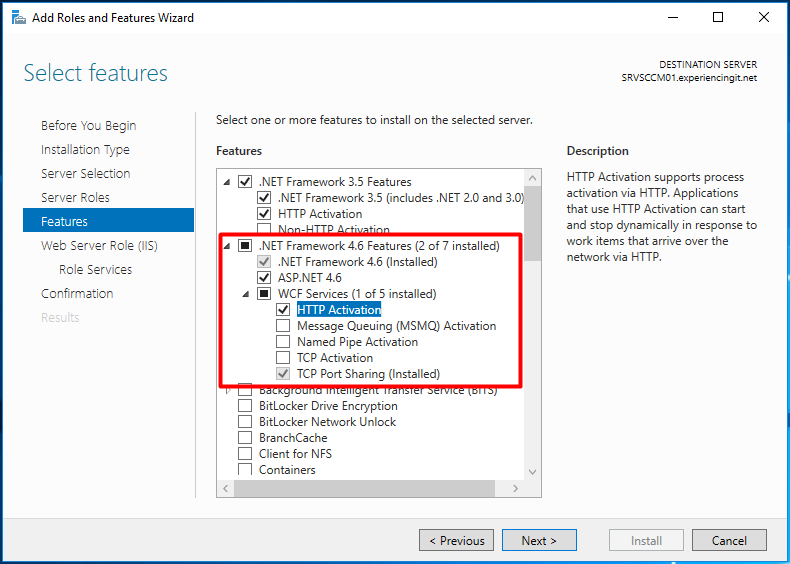
Expand “.NET Framework 4.6 Features” and expand “WCF Services”. Select “HTTP Activation” and add all additional features required for it.
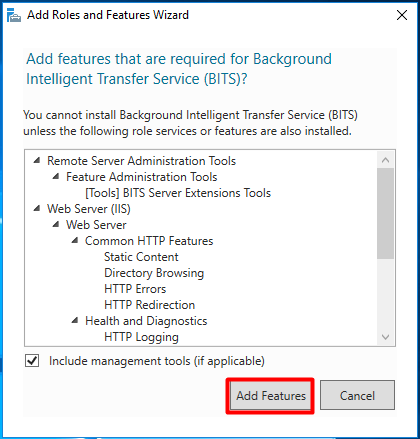
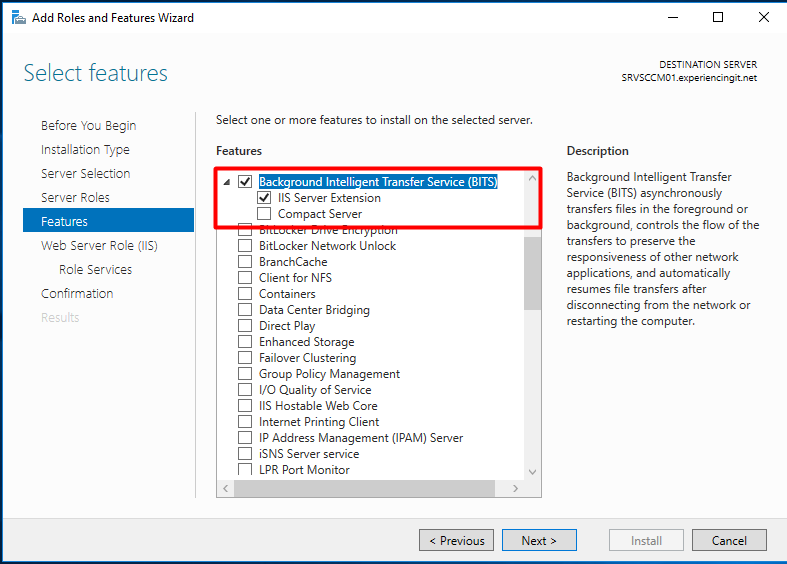
Check “Background Intelligent Transfer Service (BITS)” and add all features required for it.
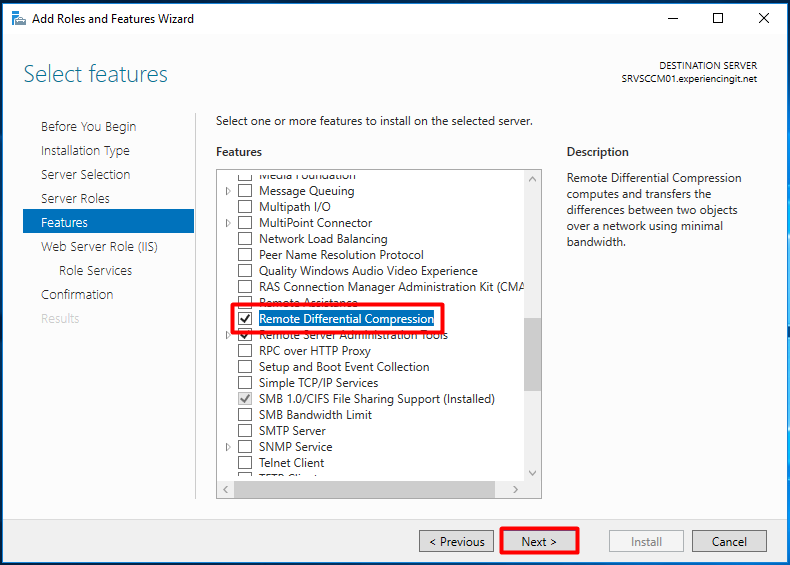
Find and select “Remote Differential Compression”. Press “Next”
Press “Next” at the “Web Server Role (IIS)” screen. At the “Select role services” screen verify that all the role services for IIS are configured as described in the prerequisites table above and press “Next”.
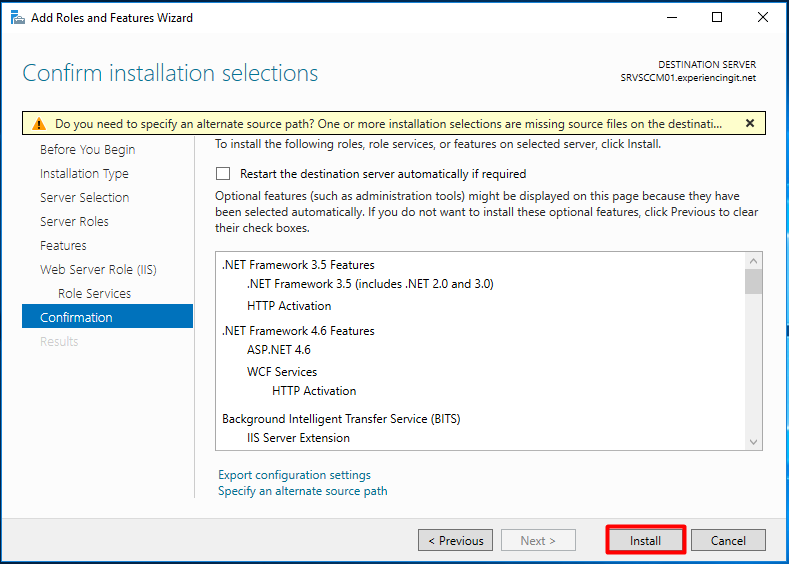
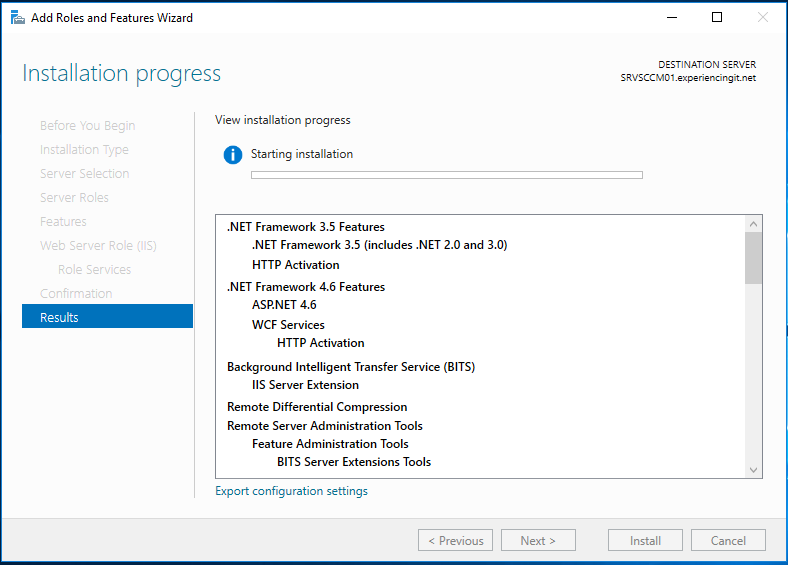
Press “Install” at the “Confirm installations options” screen and wait for the installation to finish.
After all the features are installed, run a new Prerequisite check and you’ll see that a lot of the error messages have disappeared and the existing ones are all related with components that we are going to install next!
So, let’s move on to install Windows ADK!
As always, if you found this article useful, share it with your friends.
If you have any questions or suggestions, leave your comment.
Thank you for reading!





Pingback:SCCM Current Branch Installation Guides & More - ExperiencingIT