Install SCCM Current Branch – Part 9 – Prerequisites (Install SQL Server 2016)
Introduction
In the two previous posts, I installed the Windows Features and the Windows ADK as part of the prerequisites to install SCCM. In this article I will install SQL Server 2016 SP1, configure its memory and open the necessary firewall ports for intra-site and inter-site replication.
| NOTE: This should be done at the site server (SCCM Server) using the SCCMAdmin account, created in the step two of the installation guide. |
Lets’s Start!
Downloading
Follow this link and download the setup file for the evaluation version of SQL Server 2016.
| Edit, December 1st 2018: You can now download the new SQL Server 2017 from https://www.microsoft.com/en-us/sql-server/sql-server-downloads Starting with SQL Server 2017, the Microsoft SQL Server 2017 Reporting Services are a separate download. If you choose to install SQL Server 2017, you will need to install the Reporting Services separately. Download Microsoft SQL Server 2017 Reporting Services from here: https://www.microsoft.com/en-us/download/details.aspx?id=55252 Also, bear in mind that SQL Server 2017 is only supported with a minimum of cumulative update version 2, beginning with Configuration Manager version 1710. Read more about it here: https://docs.microsoft.com/en-us/sccm/core/plan-design/configs/support-for-sql-server-versions#sql-server-2017-standard-enterprise |
Install SQL Server 2016
Before beginning remember that this operation should be done on the SCCM Site Server using the SCCM Admin account.
Browse to the location where you downloaded SQL Server setup executable and run it.
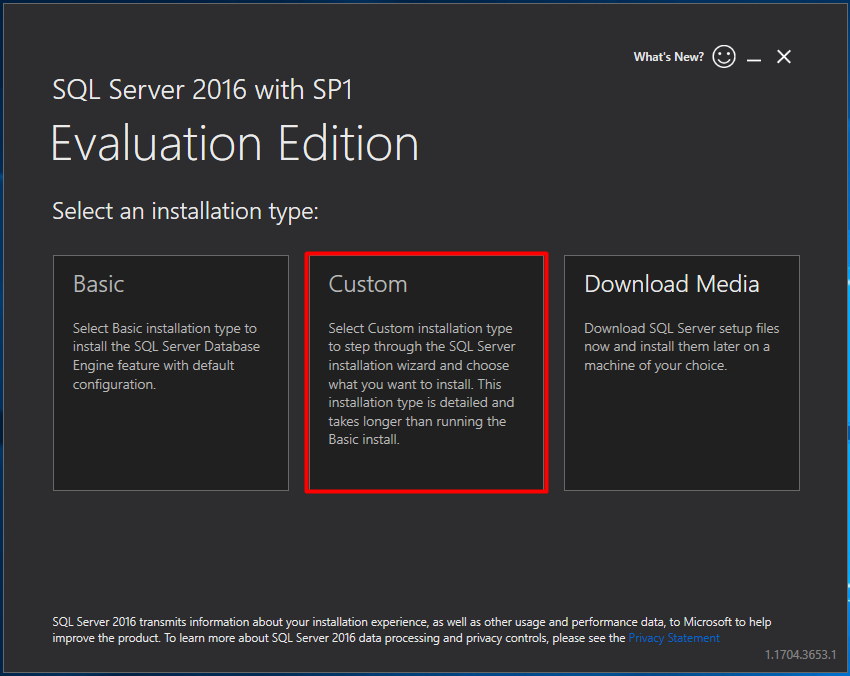
At the initial screen choose “Custom”.
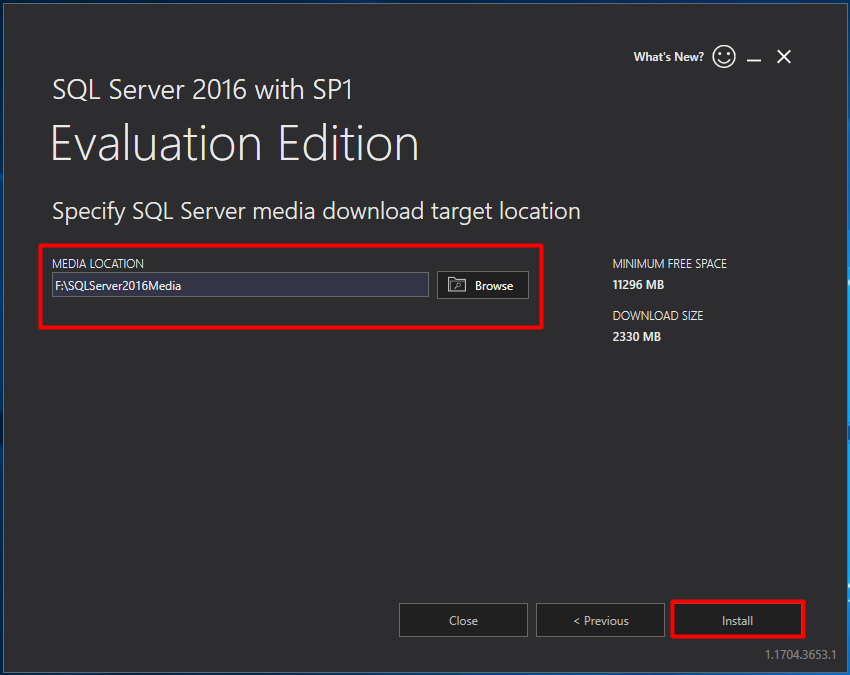
Specify where you want to download the installation media to. I chose to download to my data drive, which is drive F. Press “Install“.
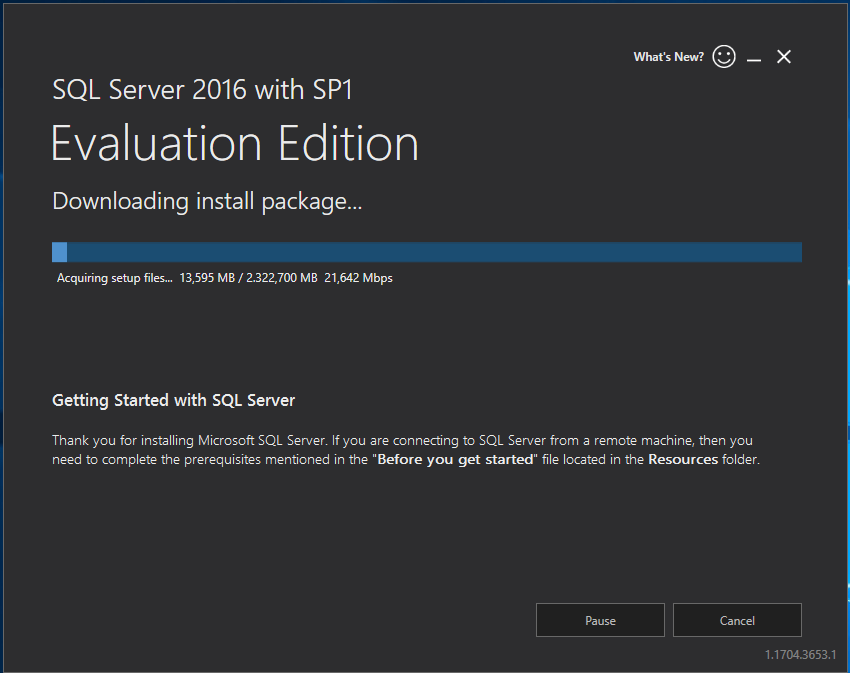
Wait while the SQL Server setup downloads the installation files.
Choose “Installation” and then “New SQL Server stand-alone installation or add features to an existing installation”.
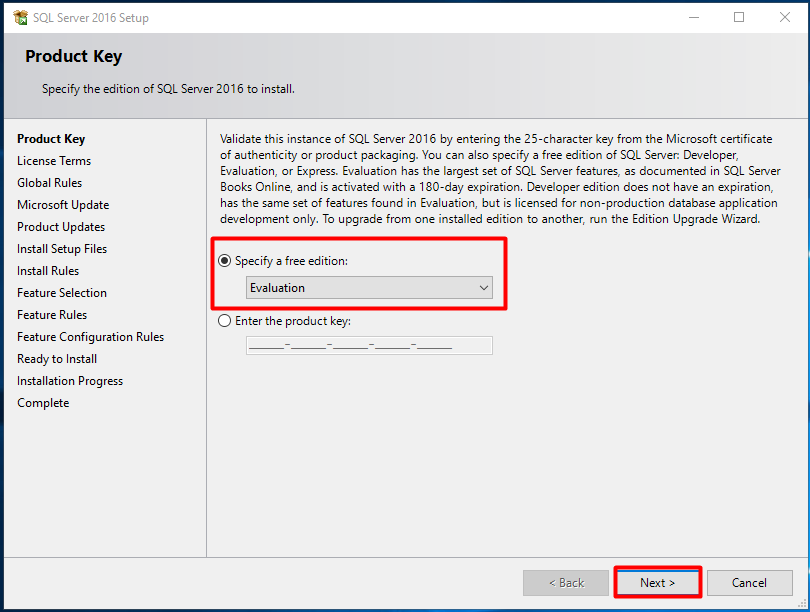
Choose “Evaluation” and press “Next“.
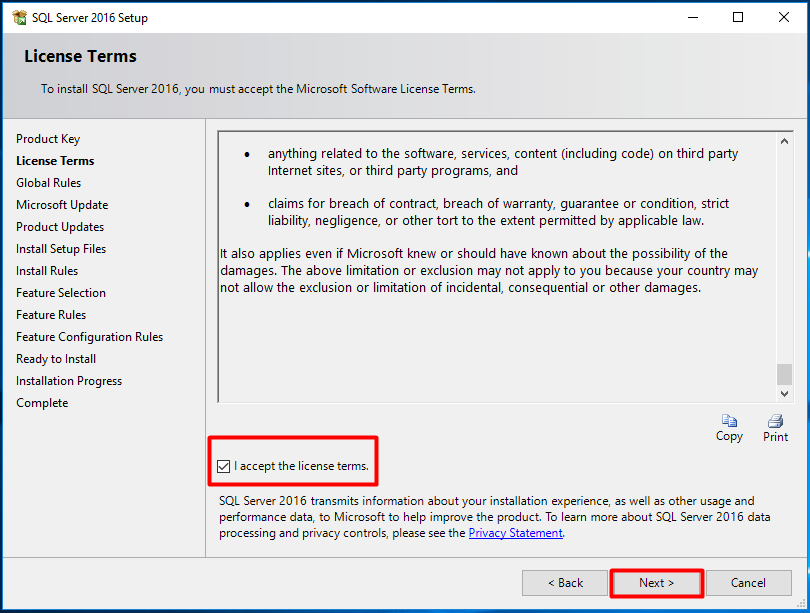
Read and accept the License Terms and press “Next“.
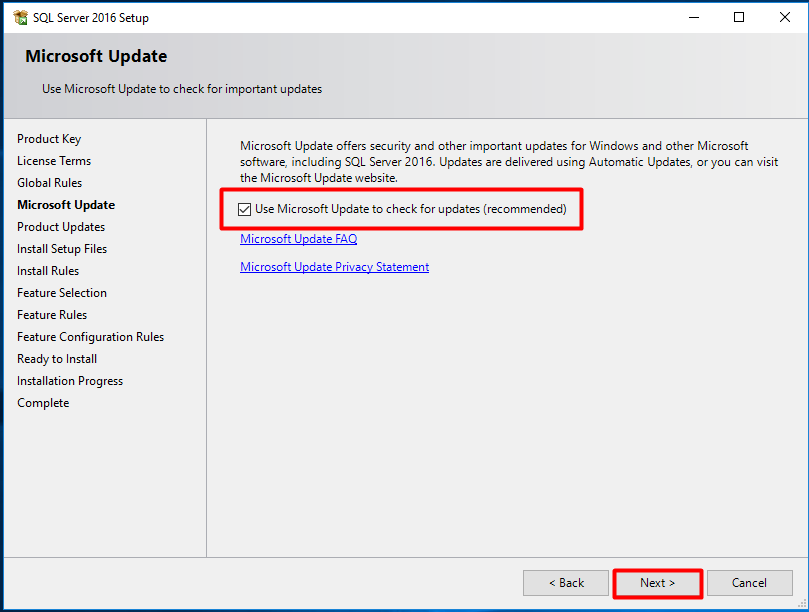
Choose whether or not to check for updates and press “Next“.
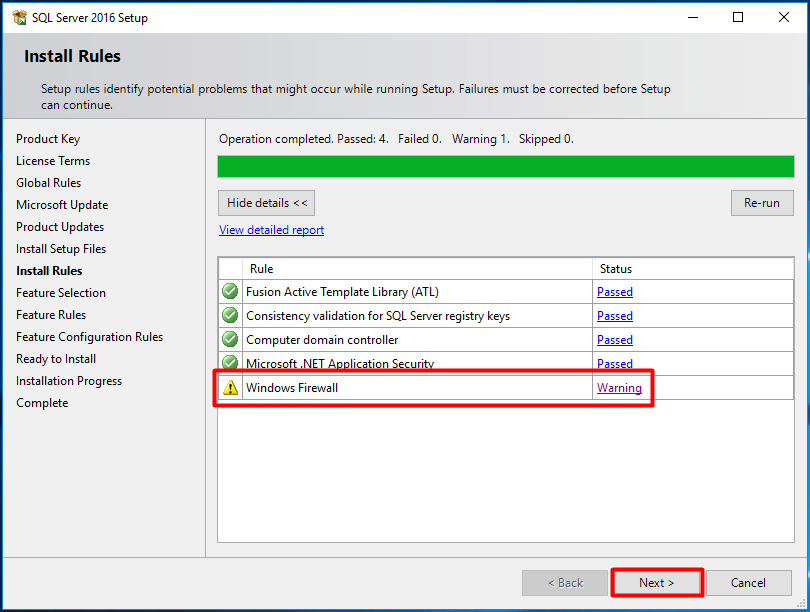
Most probably you’ll get a warning about “Windows Firewall” at the “Install Rules” screen. If you click “Warning”, you’ll see a message about the correct ports for SQL Server being opened in Windows Firewall. We will take care of that later. You can press “Next”.
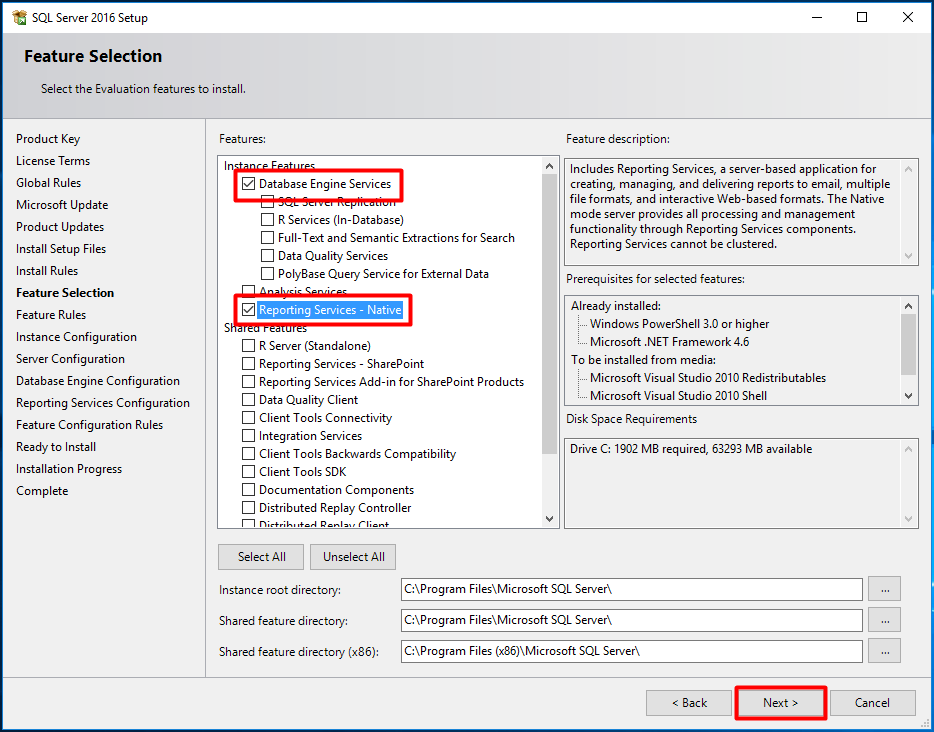
From the “Feature Selection” window, we will only need the “Database Engine Services” and the “Reporting Services – Native“. Select them and press “Next“, leaving all other options as default.
| As stated in the beginning of the article, and only if you chose to install SQL Server 2017 instead, the “Reporting Services – Native” option will not be available. You will have to install Microsoft SQL Server 2017 Reporting Services separately. |
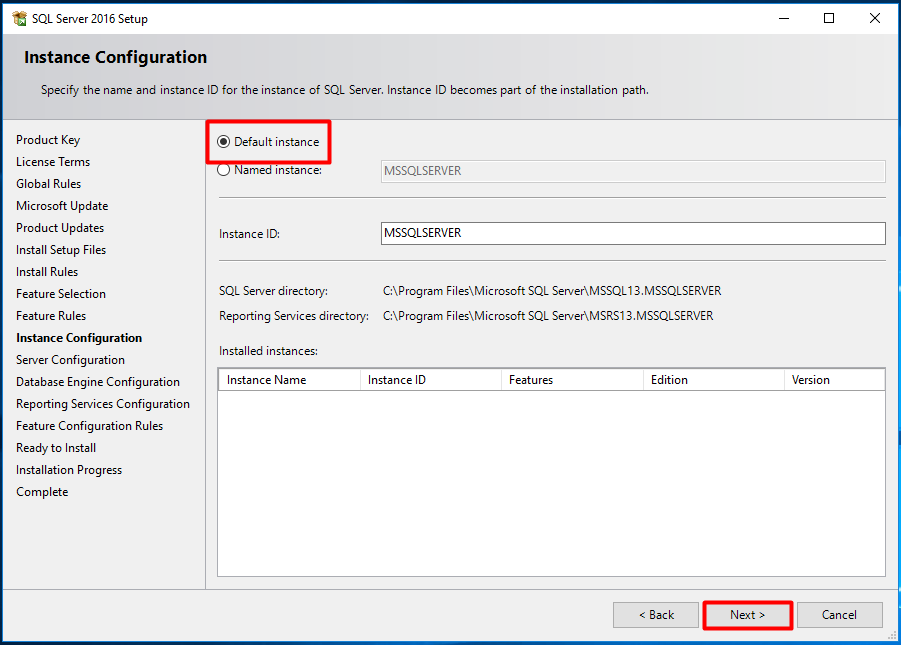
Leave the “Default Instance” selected and press “Next“.
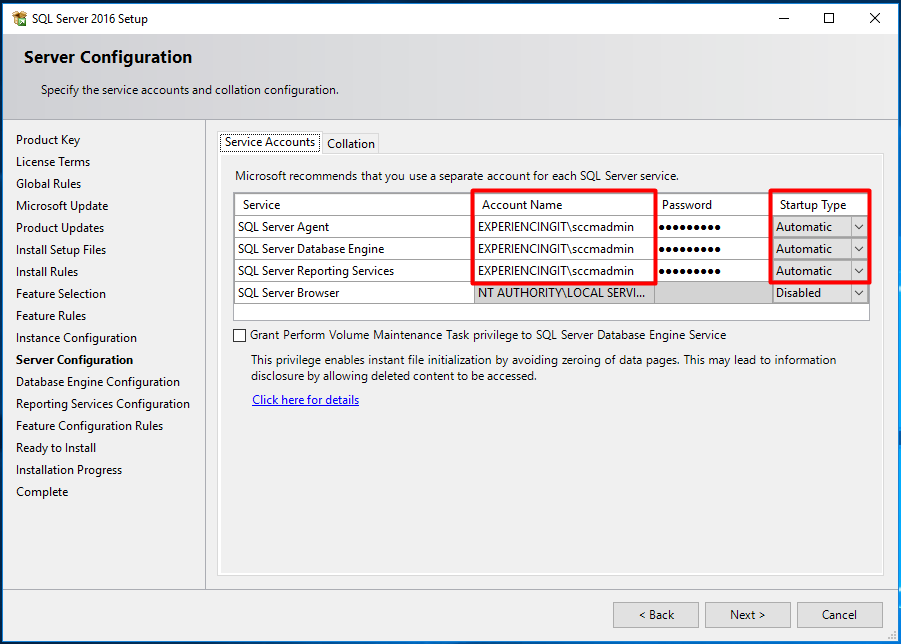
Set all SQL services to run with the SCCM Admin account and set them to start automatically. Move on to the “Collation” tab.
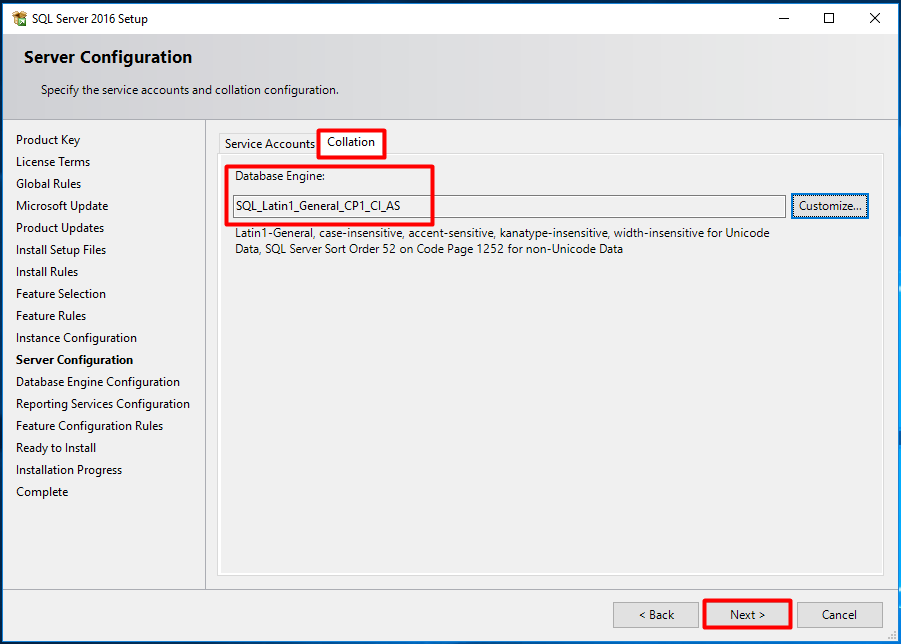
On the “Collation” tab, set the Database Engine collation to SQL_Latin1_General_CP1_CI_AS. Press “Next“.
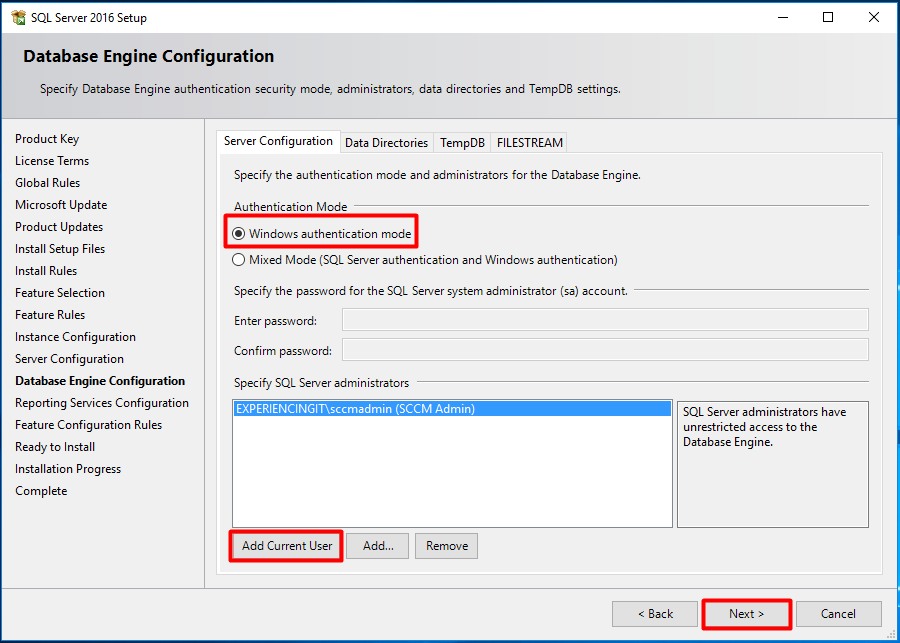
On the “Database Engine Configuration” screen, leave “Windows authentication mode” selected and press the “Add Current User” button, to add the SCCM Admin user to the list o SQL Administrators. Leave all the other tabs untouched. Press “Next“.
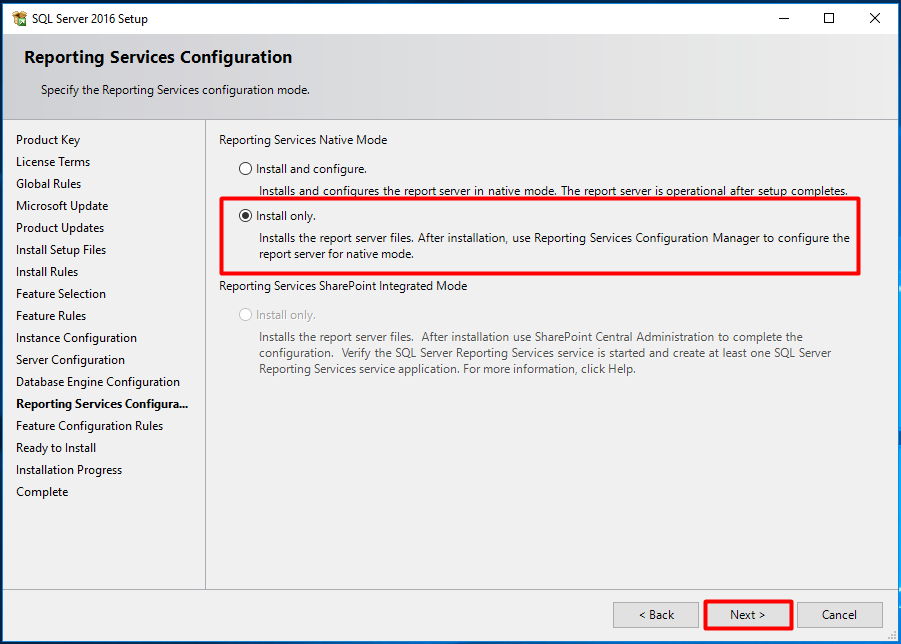
Choose “Install only” and press “Next“.
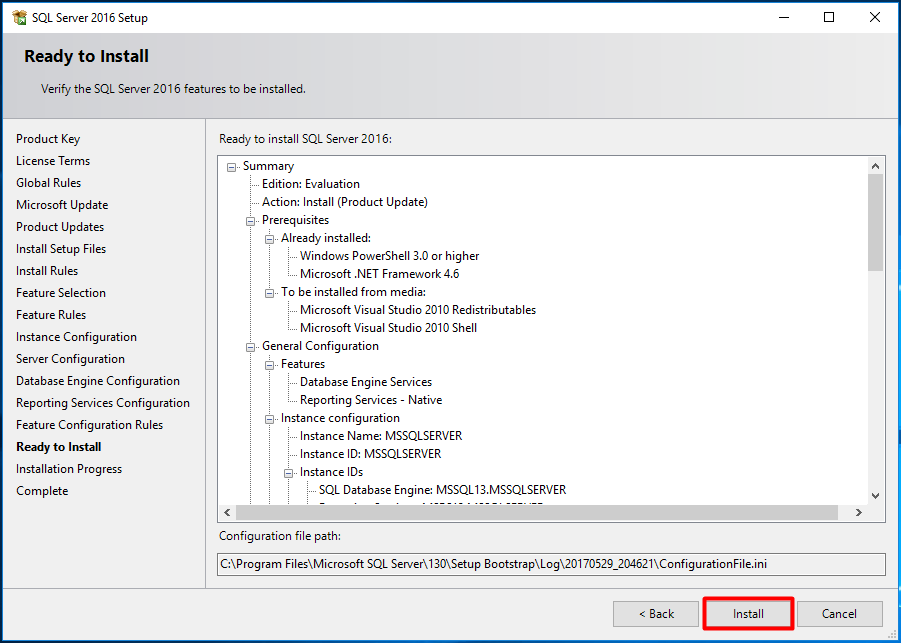
Finally, press “Install“.
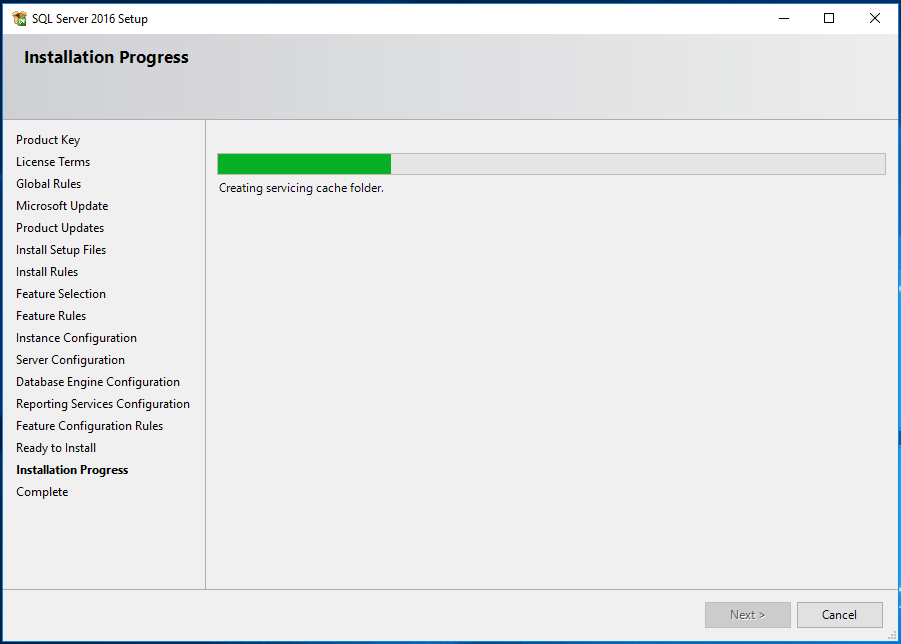
Wait for the installation to finish.
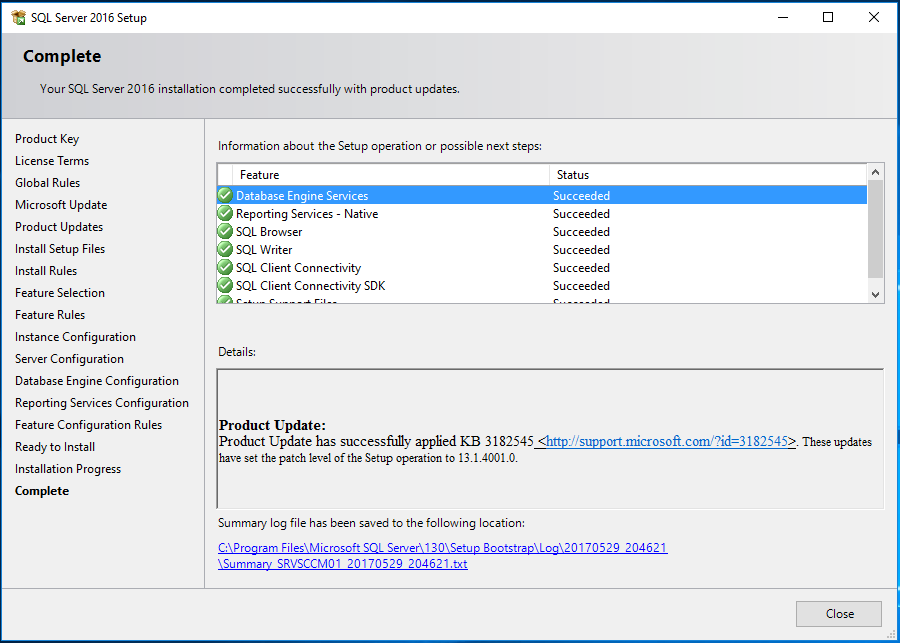
Press “Close” and the end of the installation.
Installing SQL Server Management Studio
The next step is to install the SQL Server Management Studio, as SQL Server 2016 setup does not automatically install it.
Download it from: https://docs.microsoft.com/en-us/sql/ssms/download-sql-server-management-studio-ssms.
SQL Server Memory Configuration
The SCCM setup will check if the SQL allocated memory is set to at least 8GB and if it is set to less, it will warn us. Not only to avoid this warning but because, according to Microsoft, the recommended allocated memory for SQL Server is 80% of the server’s available physical memory, I’m going to set the SQL memory setting.
To do this, open SQL Server Management Studio and connect to your database server.
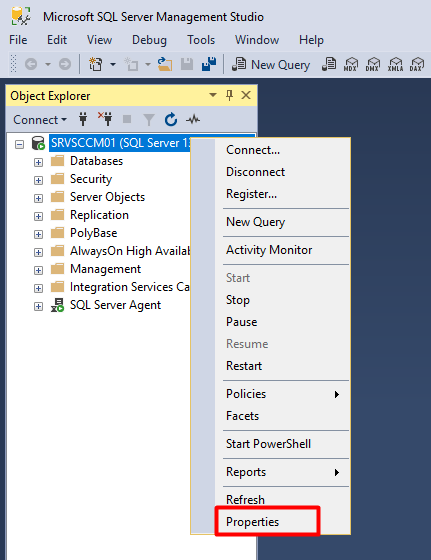
Right-click the server node and choose “Properties“.
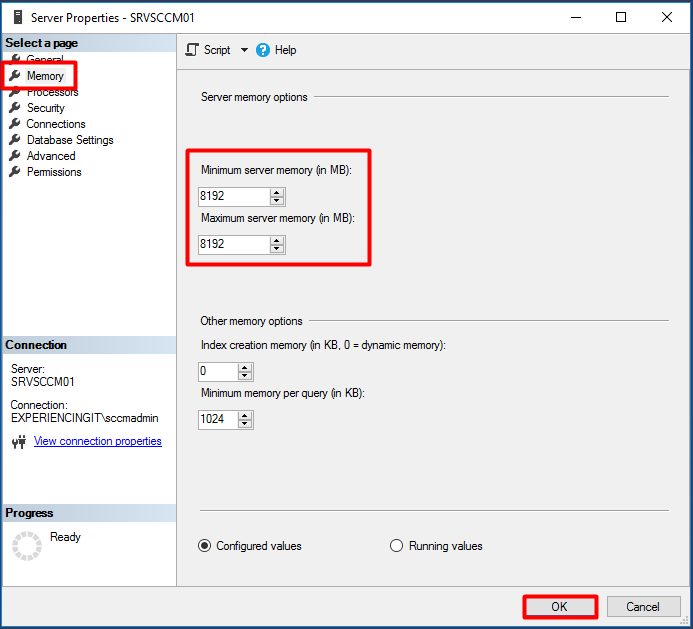
Select the “Memory” node and set the “Minimum server memory” to 8192 MB and the “Maximum server memory” to 80% of the server’s physical memory. In my case I set it up to 8192 MB because I only have 8 GB of RAM in my virtual machine. Press “OK” and it’s done.
Opening Windows Firewall ports for SQL Server
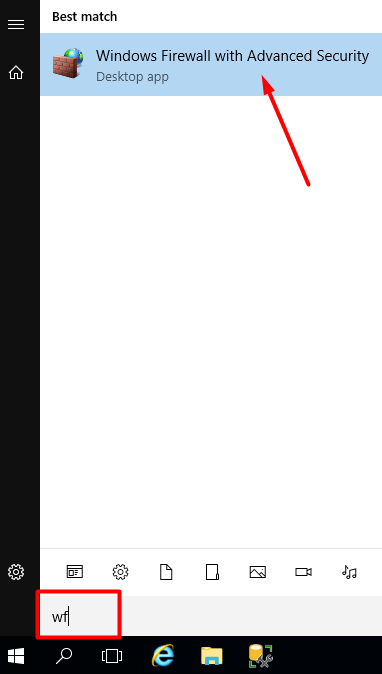
Press the “Start” button and type WF on the search box. Select “Windows Firewall with Advanced Security“.
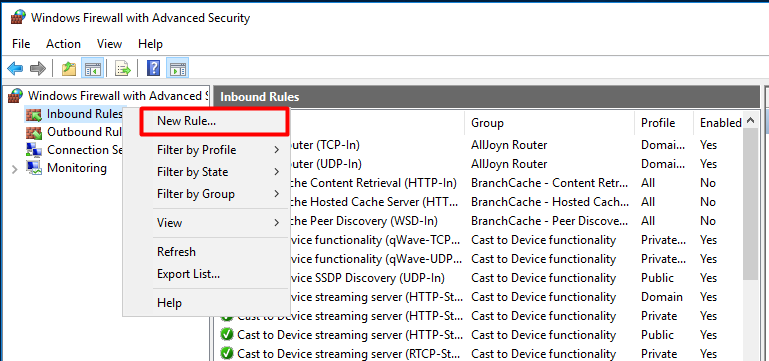
Right-click “Inbound Rules” and select “New Rule…“.
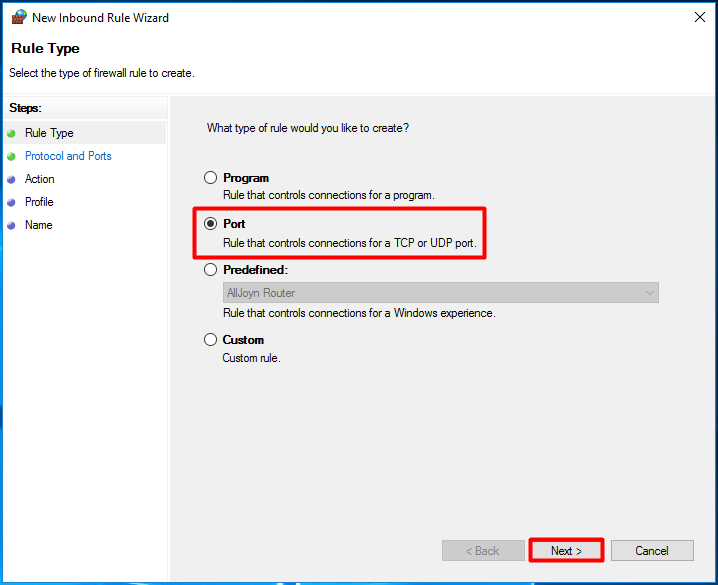
Select “Port” and press “Next“.
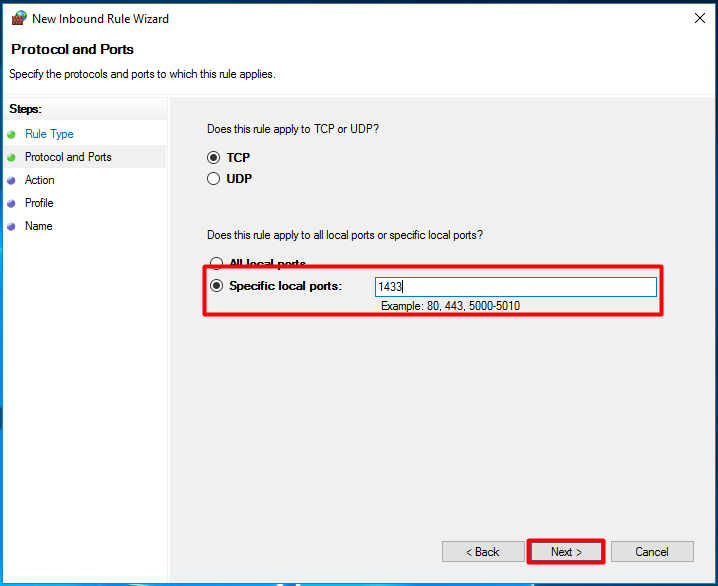
Type 1433 at the “Specific local ports” field and press “Next“.
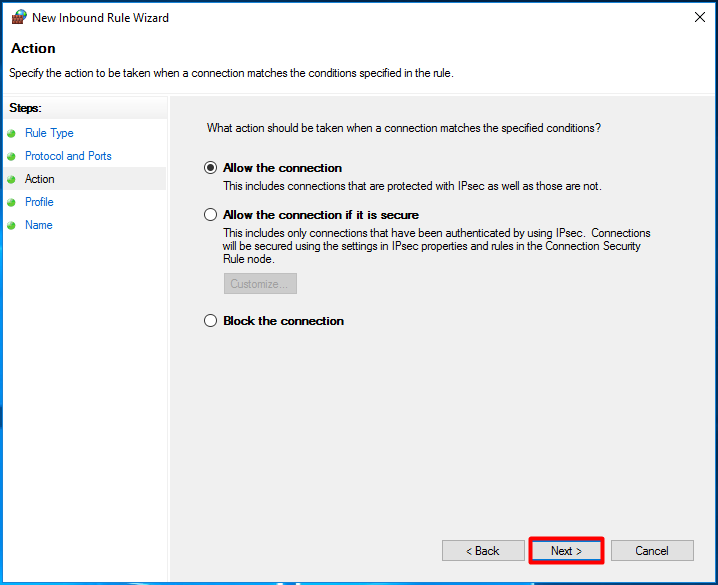
Press “Next” at the “Action” screen.
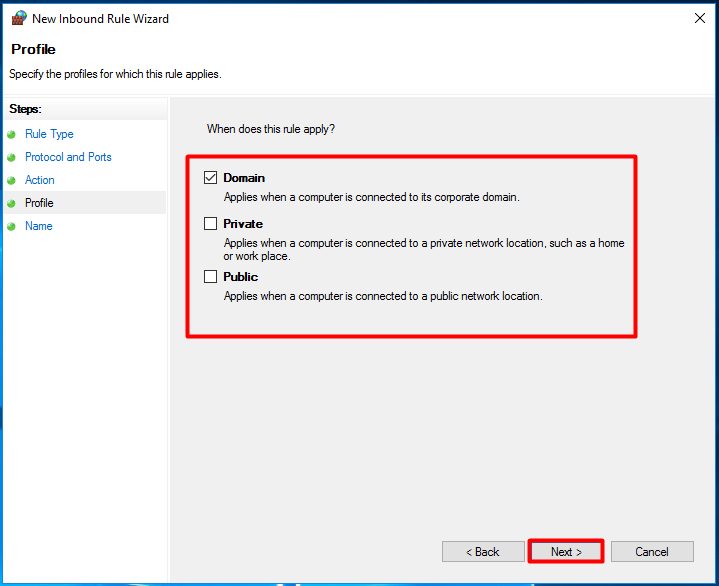
Leave only the “Domain” checkbox selected and press “Next“.
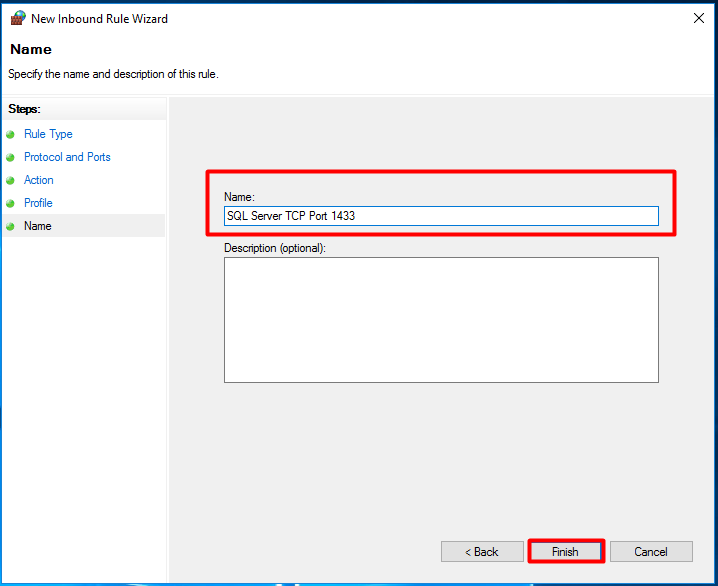
Name the rule and press “Finish“.
Repeat the above steps for port 4022.
And this concludes the installation of SQL Server at our SCCM Site Server machine. In the next post I will install WSUS.
Further reading:
https://docs.microsoft.com/en-us/sccm/core/plan-design/configs/support-for-sql-server-versions
https://technet.microsoft.com/library/ms191144(SQL.105).aspx
https://docs.microsoft.com/en-us/sccm/core/plan-design/configs/recommended-hardware
As always, if you found this article useful, share it with your friends.
If you have any questions or suggestions, leave your comment.
Thank you for reading!






Pingback:SCCM Current Branch Installation Guides & More - ExperiencingIT