SCCM Current Branch – Adding the SUP role
After having installed the SCCM Server, updated it, configured the discovery methods and boundaries, it is now time to start adding some roles to it!
In this article I will be installing the SUP (Software Update Point) role, a role that is fundamental to configure software updates deployments.
Useful and advisable quick reading before starting installing the SUP role:
| https://docs.microsoft.com/en-us/sccm/sum/plan-design/prerequisites-for-software-updates |
Adding the SCCM SUP role
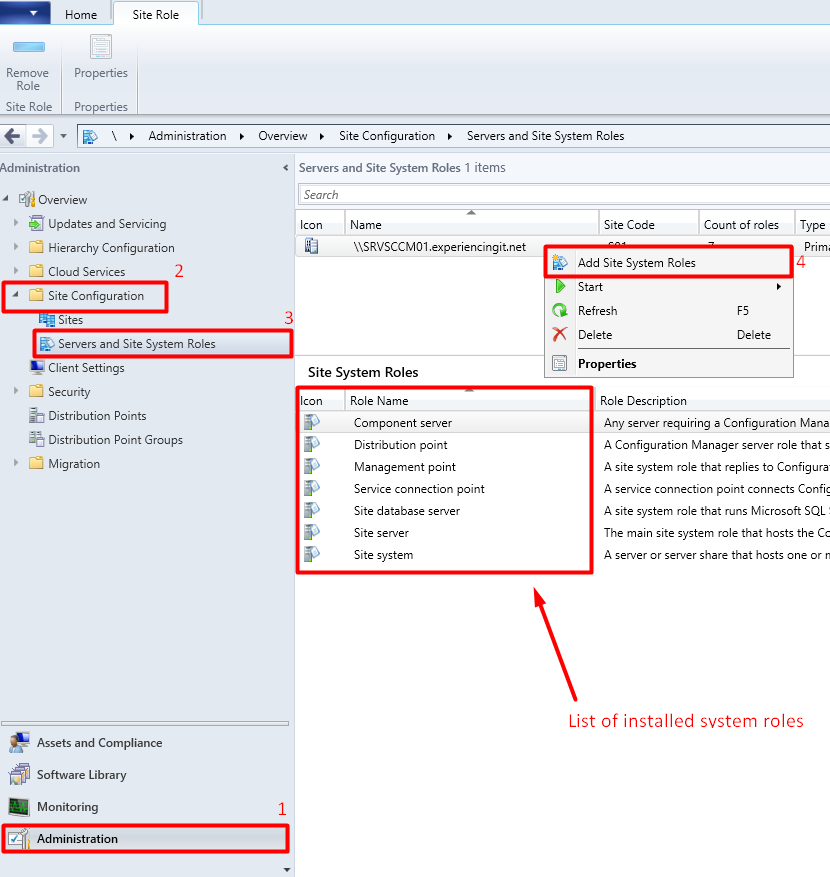
Open the Configuration Manager console, click on “Administration” (1), expand “Site Configuration” (2), click on “Servers and Site System Roles” (3). In the bottom pane of the window, you’ll see a list of the installed system roles. To add a new role, right-click on the server name and choose “Add Site System Roles” (4).
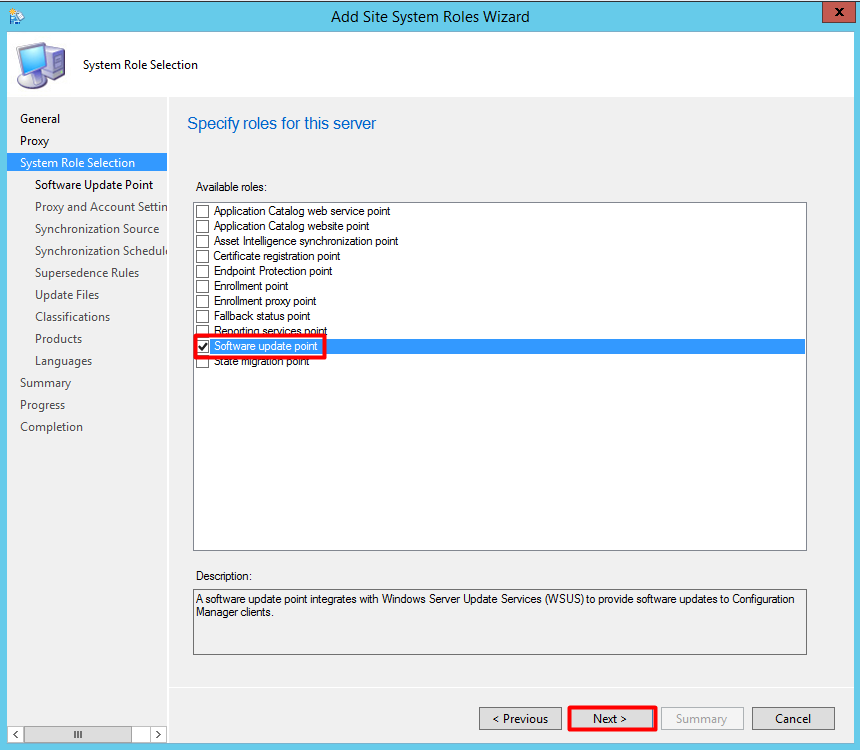
At the “Add Site System Roles Wizard” window, press “Next” ’till you reach the “System Role Selection” window. Here select “Software update point” and press “Next”.
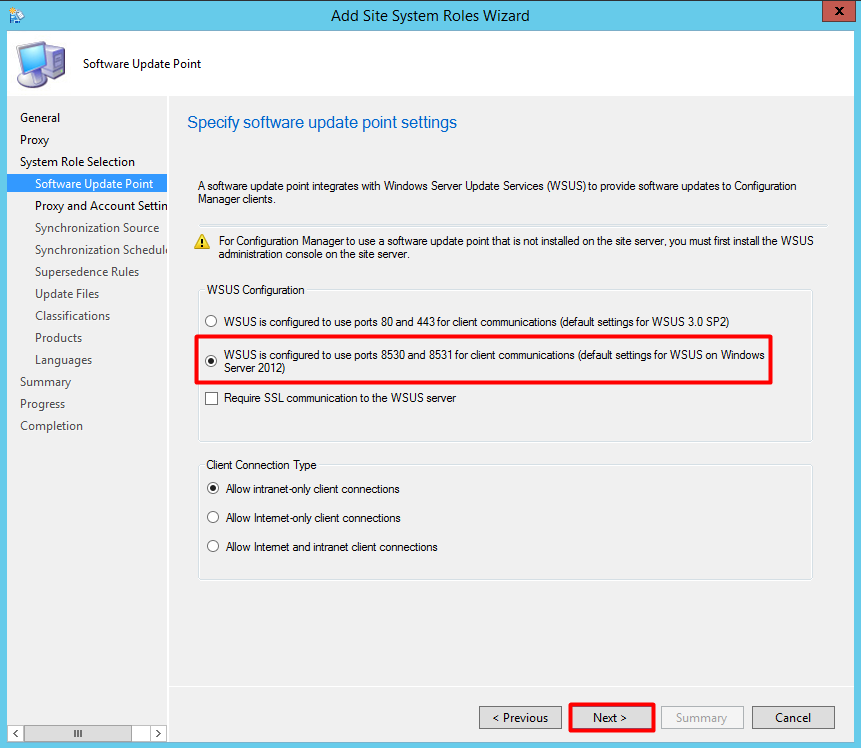
Select the WSUS configuration option as shown below and press “Next”.
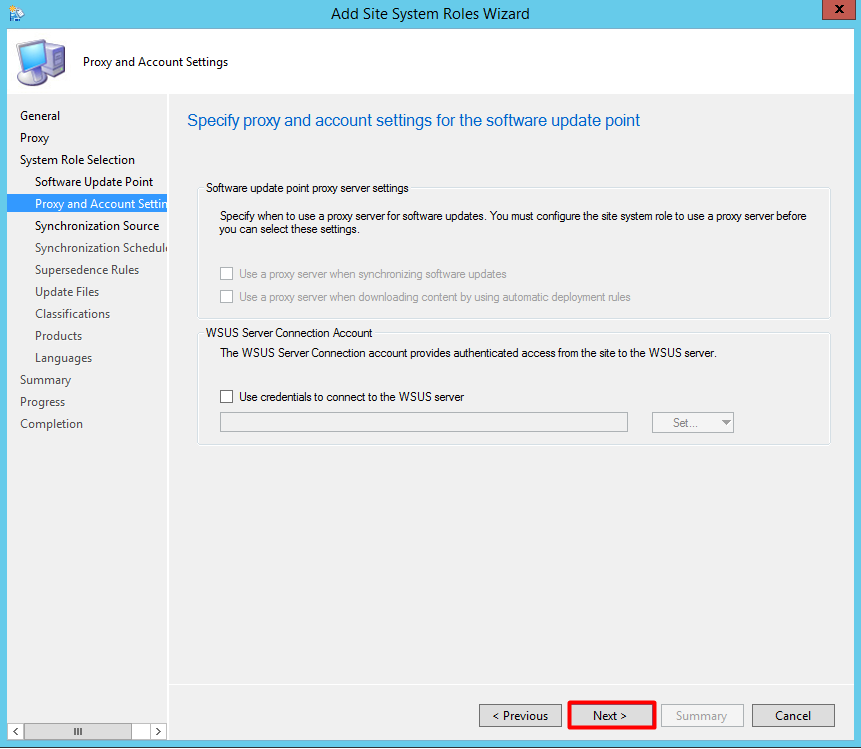
At the Proxy configuration window, if you’re not using one, press “Next”. If you’re using a proxy server to access the internet configure it now.
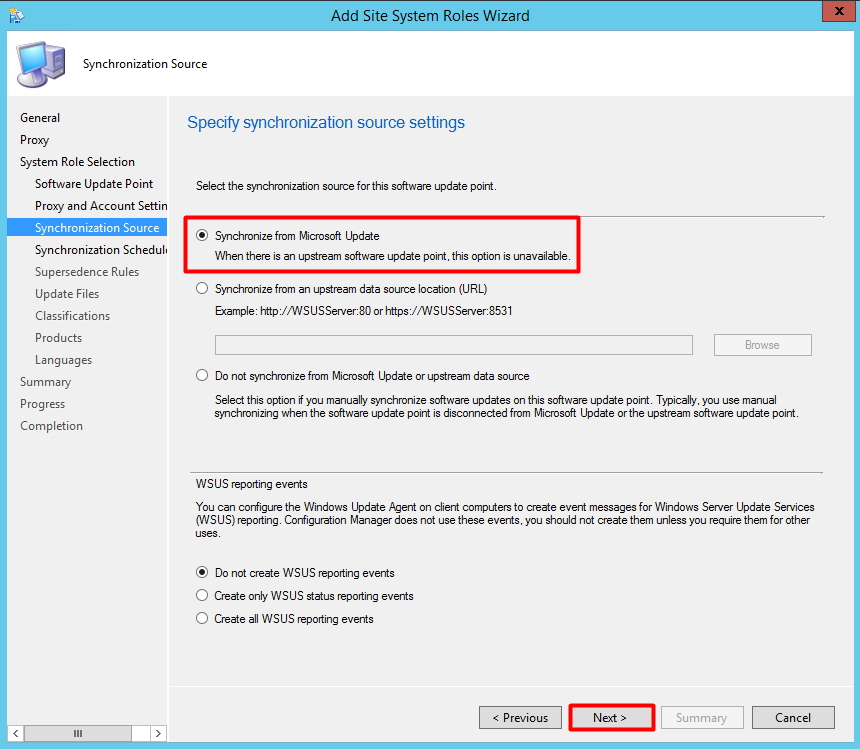
Make sure that the synchronization source is pointing to Microsoft Update and press “Next”.
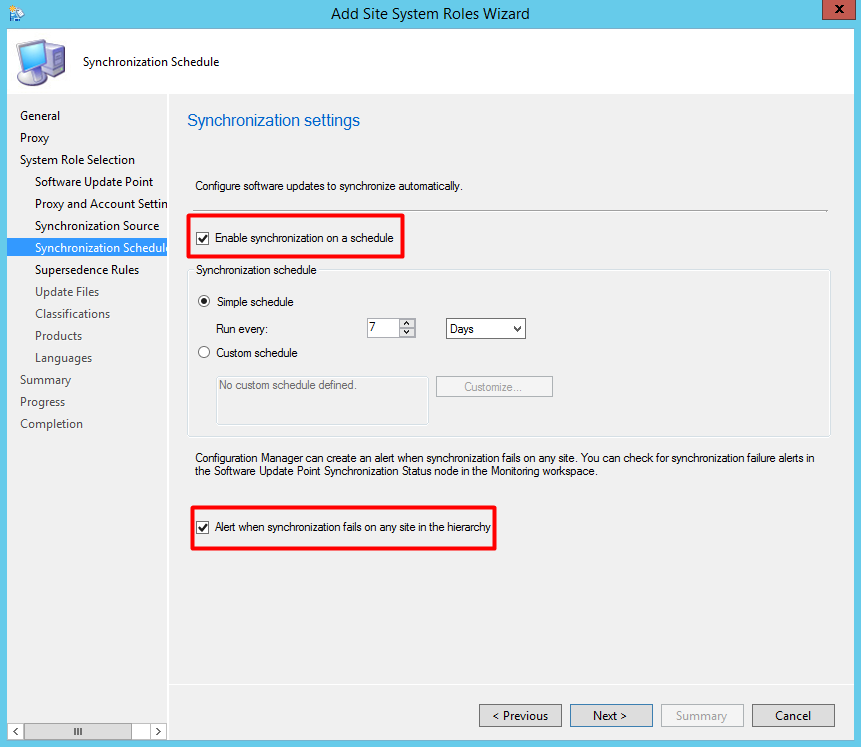
Let’s enable synchronization on a schedule. You can leave the default value of 7 days. Check “Alert when synchronization fails on any site in the hierarchy”. Press “Next”.
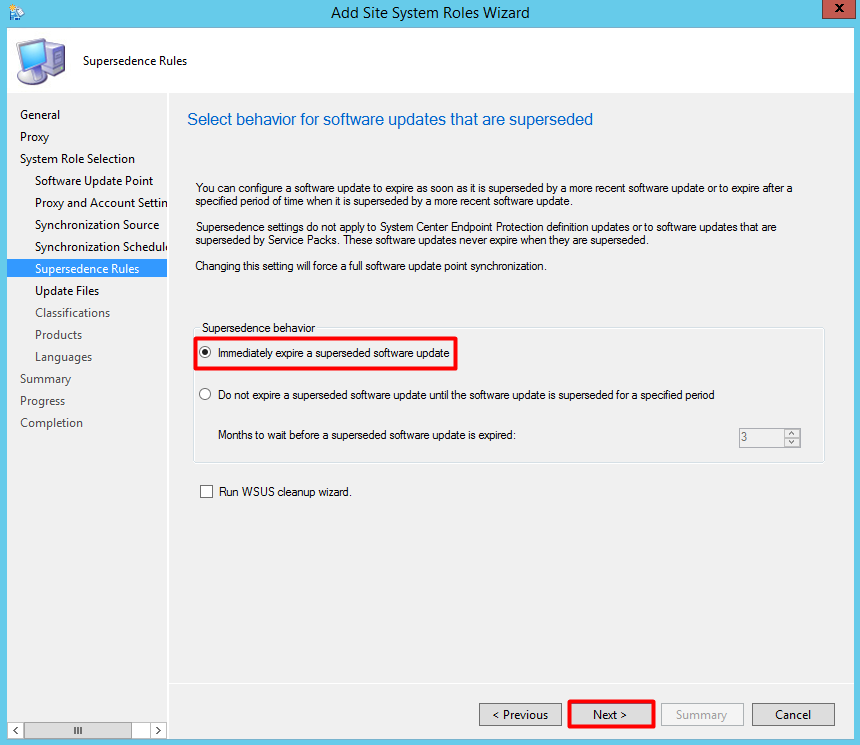
Select “Immediately expire a superseded software update”. Right we do not need to run a WSUS cleanup, so leave that checkbox unchecked. I’ll later write an article on how to run the WSUS cleanup wizard. By default it runs every 30 days.
In the meantime, if you’d like to read more about it, you can do so here: https://docs.microsoft.com/en-us/sccm/sum/deploy-use/software-updates-maintenance. Press “Next”.
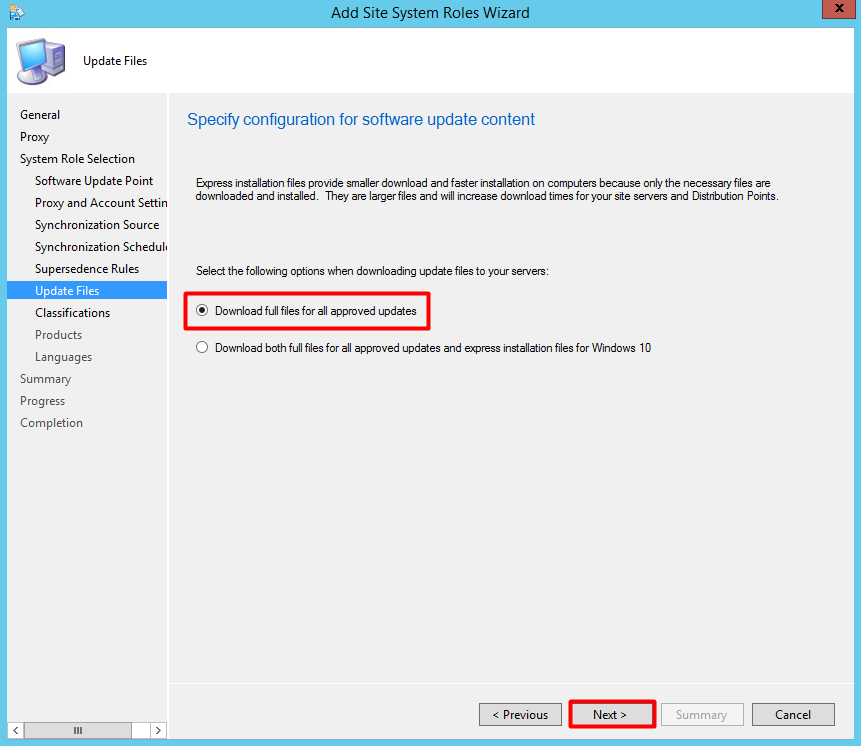
Leave the default setting of “Download full files for all approved updates” and press “Next”.
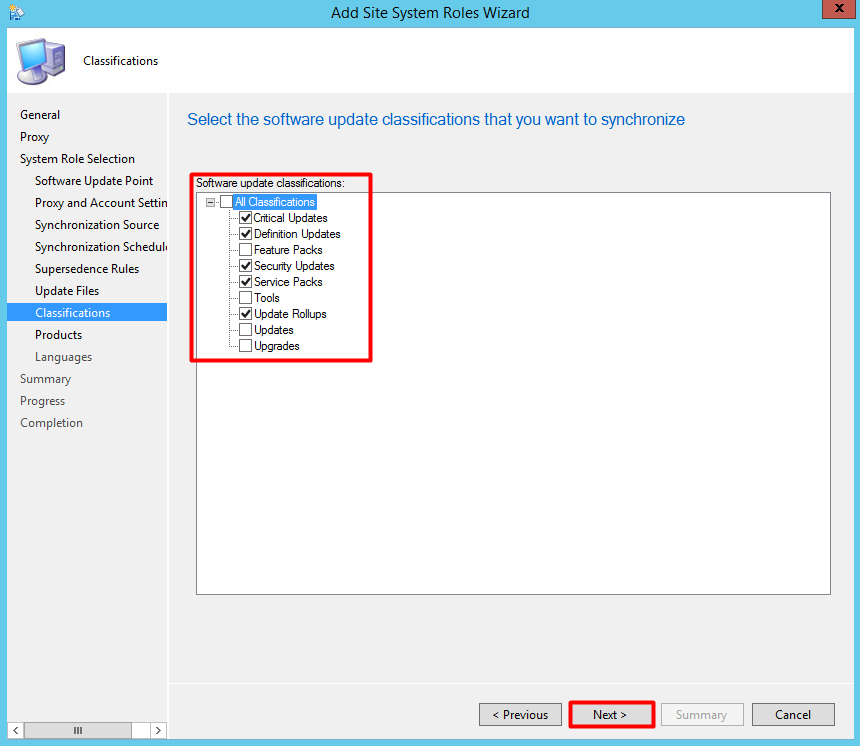
For the software update classifications, configure as below. I’m also adding the “Definition Updates” classification because, maybe, later on, I’ll install the Endpoint Protection role. Press “Next”.
On the product selection window, leave as default and press “Next”.
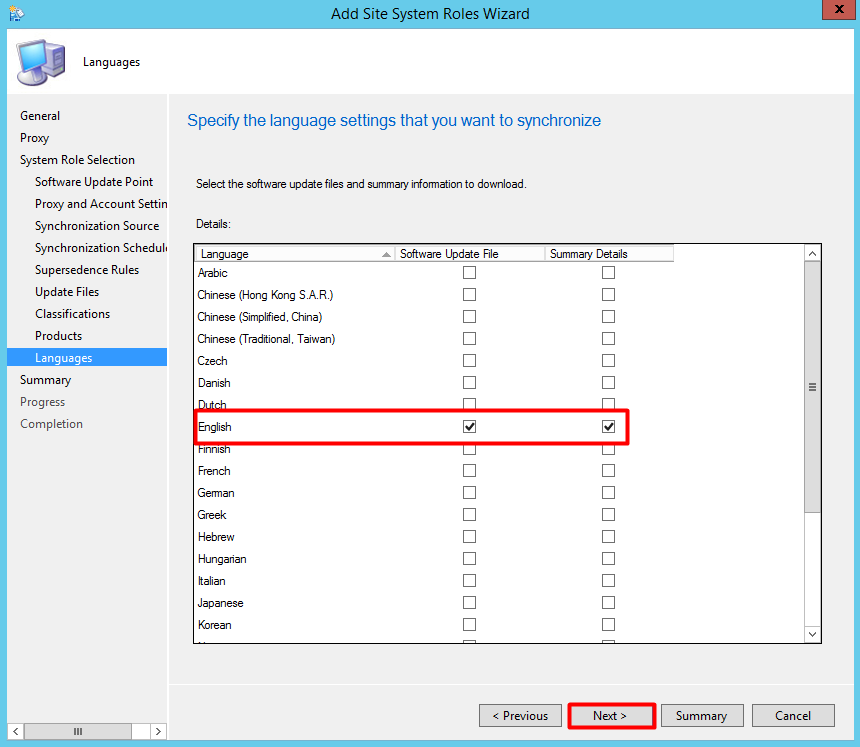
On the language selection window, Ill leave only “English”. Press “Next”.
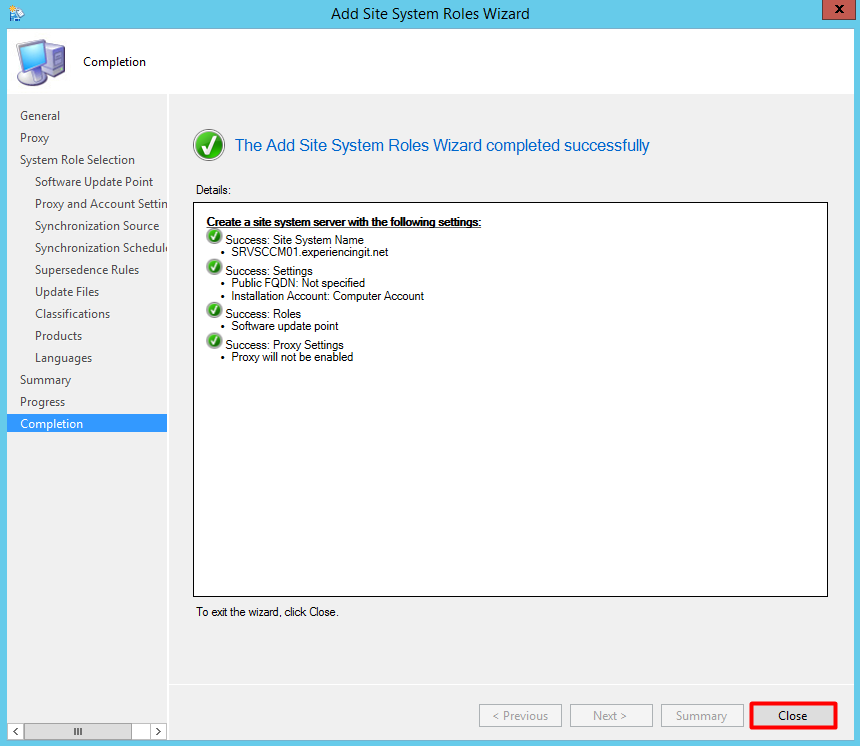
Click “Next” at the “Summary” window, wait for the installation to complete and press “Close” on the “Completion” window.
Check the SUPSetup. log, in [SCCM Installation Path]\Logs. You should get a line with success:
The SUP role is now installed. In the next post I will update the products to downloads updates for and synchronize the server.
Further reading
https://docs.microsoft.com/en-us/sccm/sum/get-started/install-a-software-update-point
Again, if you found this article useful, share it with your friends.
If you have any questions or suggestions, leave your comment.
Thank you for reading!








Pingback:SCCM Current Branch Installation Guide & More - ExperiencingIT