SCCM Current Branch – Deploying the CM Client Via Software Updates
In my previous post, I’ve installed the SCCM Software Update Point (SUP).
Now it is time to install the SCCM Client to our client computers using exactly this same SUP, but for it to work we must first configure a GPO in AD to specify the software update point.
Let’s get to it!
Add a GPO Specifying the Intranet Microsoft Update Service Location
| Note: This step is performed on the Domain Controller. |
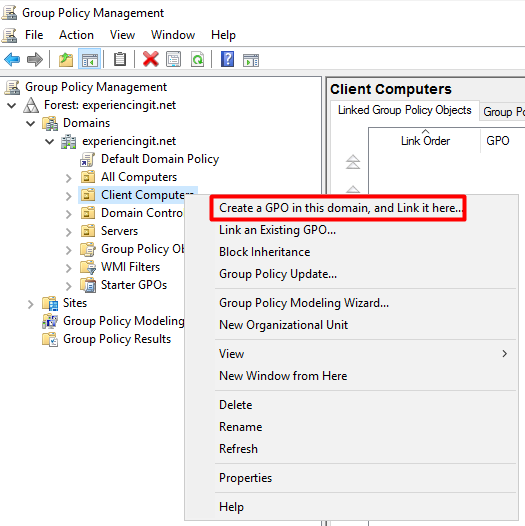
Please note that I’ve created an OU in the AD named “Client Computers”, to which I’m going to link this GPO. In your setup you might want to do the same or you can just link it directly to the domain.
Open the “Group Policy Management” console, right-click the OU to which you want to link the GPO and select “Create a GPO in this domain, and link it here…”.
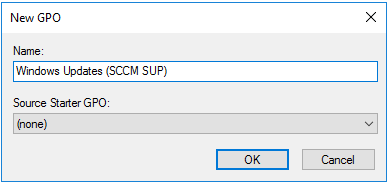
Now, name your GPO with an easily identifiable name, ie, that you know what that GPO is doing and click on OK.
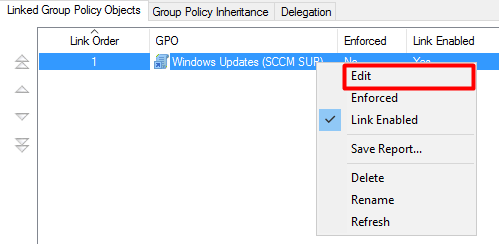
On the right pane of the GPO console, right-click the policy and choose Edit.
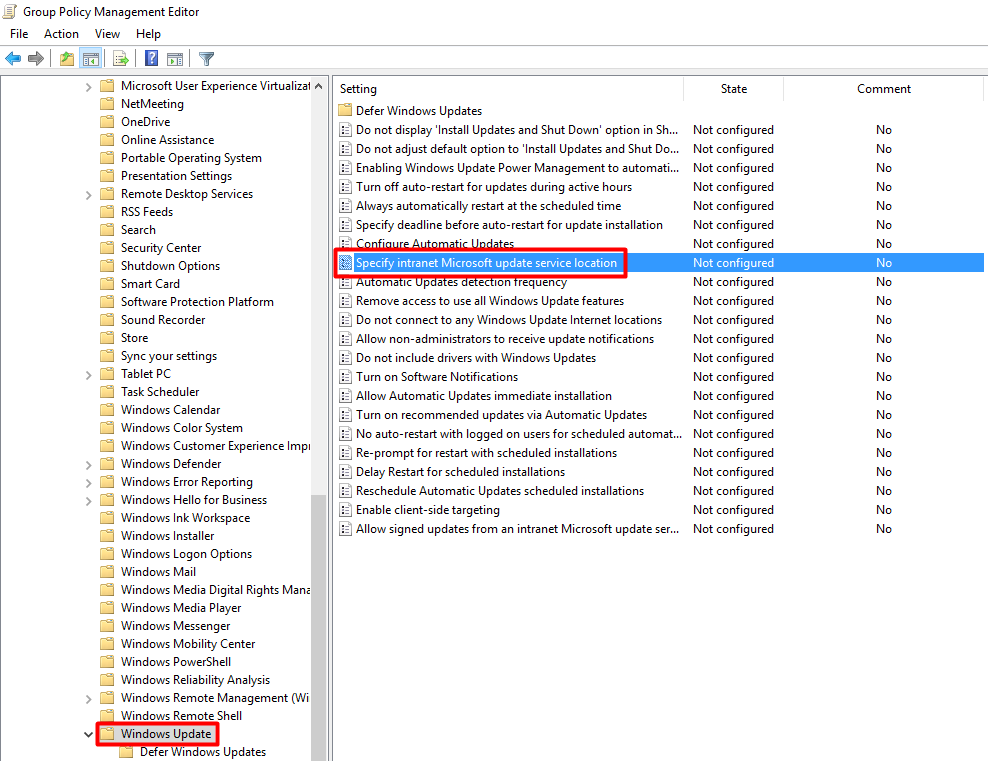
Expand Computer Configuration » Administrative Templates » Windows Components and click on Windows Update. Select and double-click the Specify intranet Microsoft update service location policy.
Set this setting to Enabled and specify the intranet update services server address, as shown below. The server name format is http://[YOUR SCCM/WSUS SERVER NAME]:8530. Insert the same address in the Intranet statistics server field. Click OK and this ends configuring the GPO pointing to our site server for updates.
If you don’t know what port is being used or you just want to check it out, this article might help you: https://technet.microsoft.com/en-us/library/hh237371.aspx.
Enabling the Software Update-Based Client Installation in SCCM Current Branch
| NOTE: This step is performed in the SCCM Site Server computer and logged in with the SCCMAdmin account, configured as part of the service users in use in my environment. |
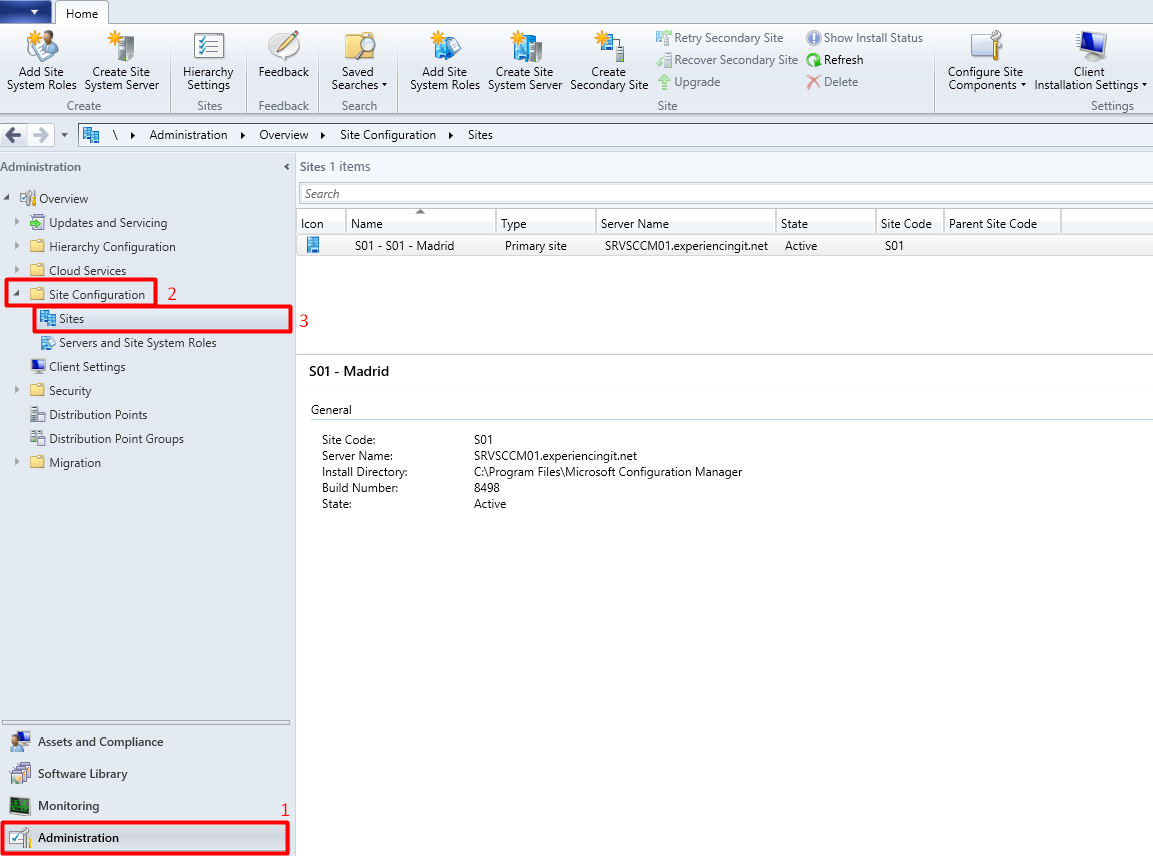
In the Configuration Manager console, click Administration (1) and expand Site Configuration (2). Click Sites (3).
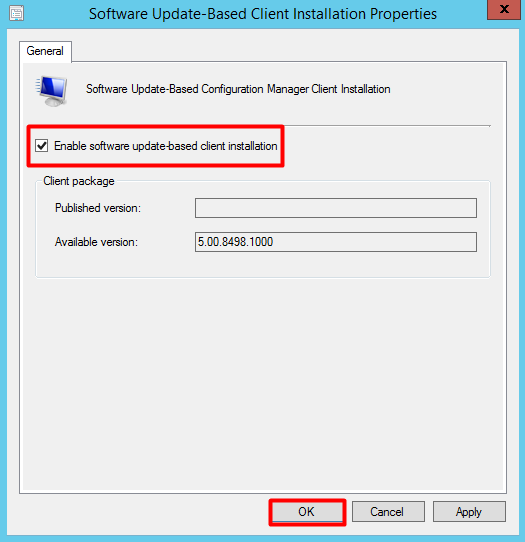
On the Home tab, in the Settings group, click Client Installation Settings, and then click Software Update-Based Client Installation.
In the Software Update Point Client Installation Properties dialog box, select Enable software update-based client installation to enable this client installation method. To finish configuring the software update point client installation, click OK.
| Note |
| If the client software on the System Center Configuration Manager site server is a later version than the client version stored on the software update point, the Later Version of Client Package Detected dialog box opens. Click Yes to publish the most recent version of the client software to the software update point. If the client software has not been previously published to the software update point, this box will be blank. |
Verifying that it is working!
There are several ways you can use to verify the correct installation of the SCCM Client, being the first one:
-
Observation
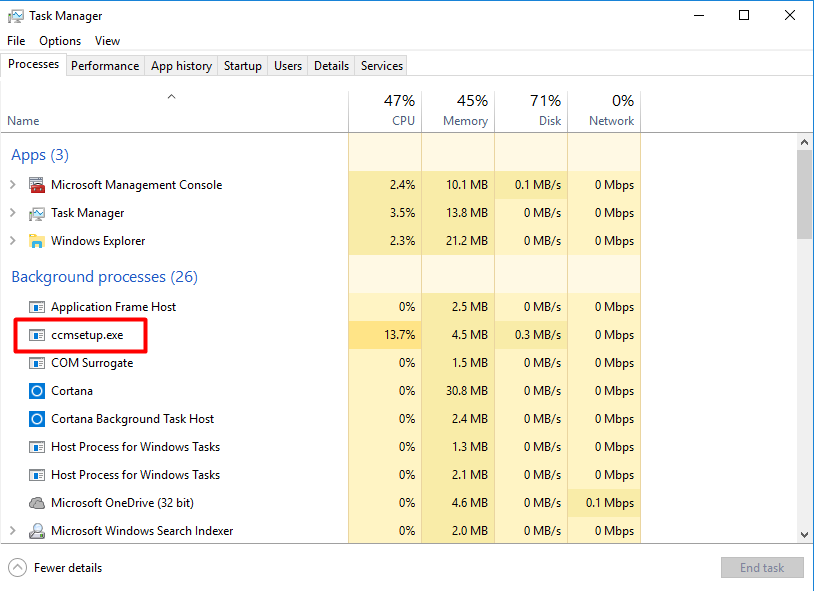
Maybe you can just run a gpupdate /force or reboot the machine and visually pay attention if the hard drive starts to have some activity. If you see some activity, open Task Manager and find the ccmsetup.exe executable running as a background process, like the image below:
-
Analyzing The Event Viewer
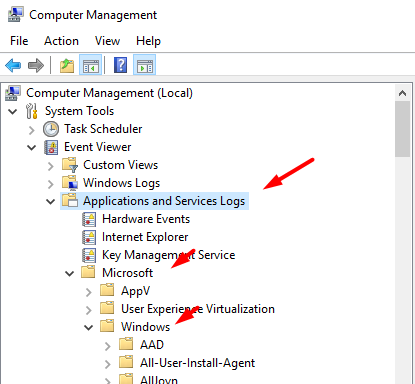
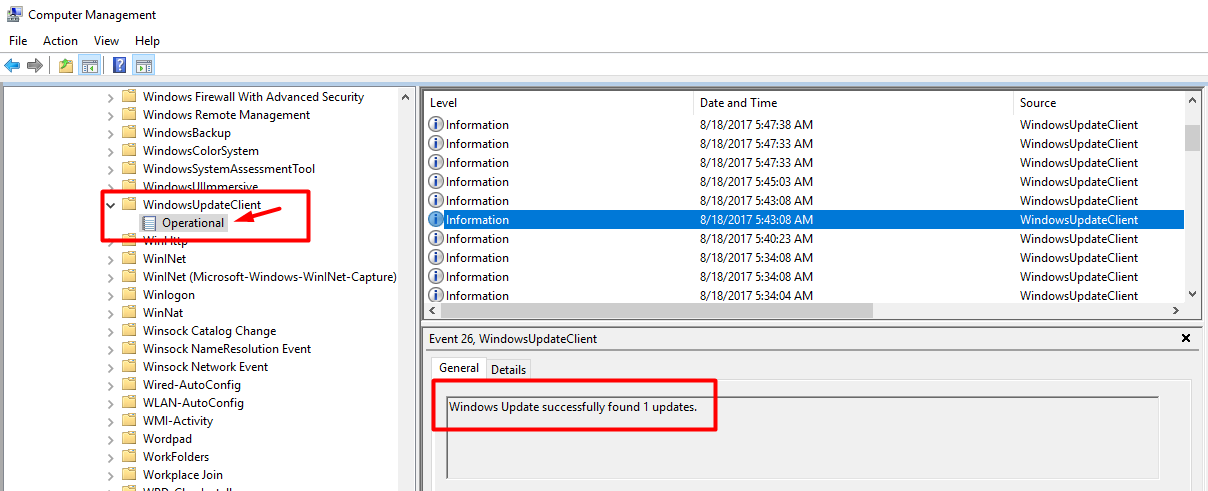
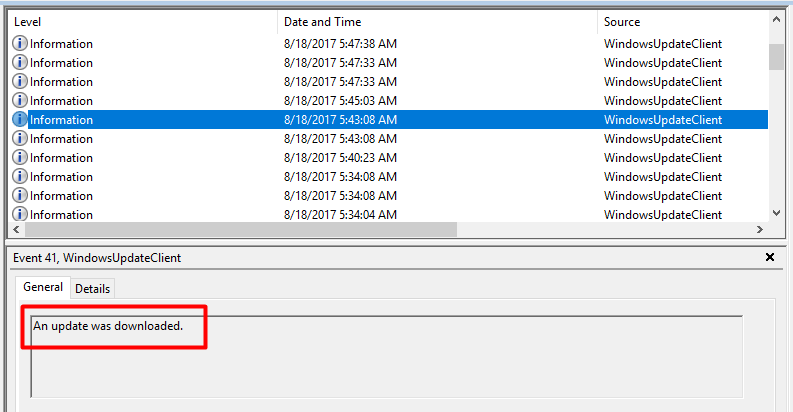
Another way to verify that the CM Client is being pushed to the machine via the software updates service is by opening the Event Viewer, expand Application and Services Logs » Microsoft » Windows and find Windows Update Client. Expand it and select Operational. On the right-hand pane of the viewer, you’ll find the entries showing that the WU Client has found updates and is downloading them, for future installation.
-
Examining the WindowsUpdate.log file
You can also examine the WindowsUpdate.log file. In Windows 10, the way this file is delivered is a bit tricky but nothing that hard to retrieve. If you open the WindowsUpdate.log (%windir%\WindowsUpdate.log) file you’ll see this message inside:
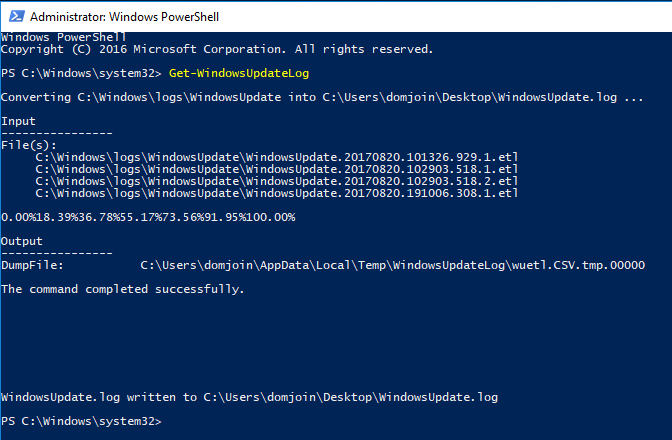
To transform the files described in the WindowsUpdate.log file, you need to run the following command at a PowerShell prompt (run as administrator):
You’ll get a message like the one below and the WindowsUpdate.log file will be placed on your desktop:
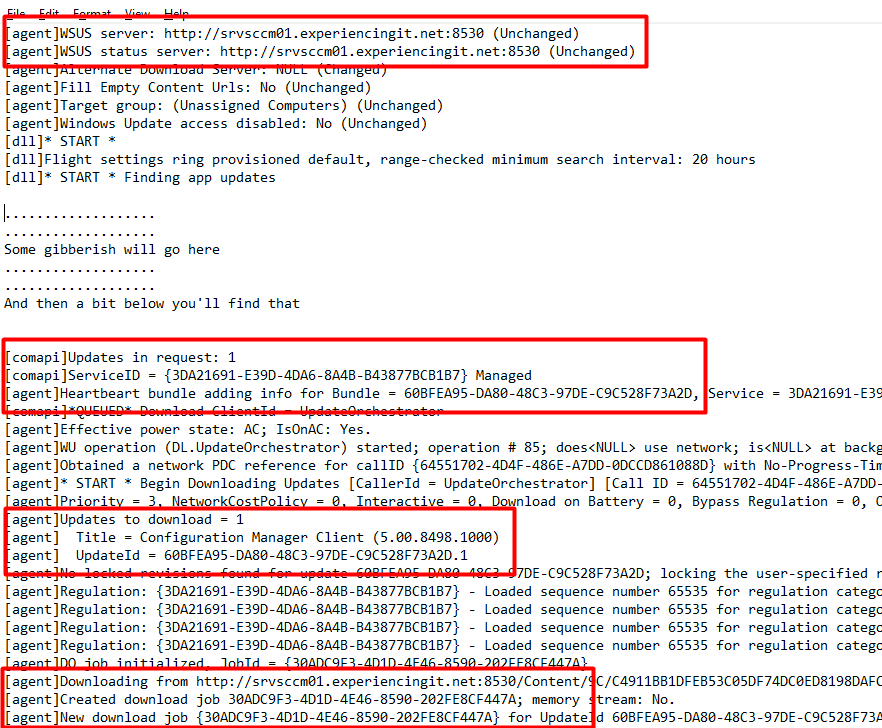
Open the file (I advise using CMTrace, although here I am using Notepad) and find within the lines where it successfully find the Configuration Manager Client update, as shown below.
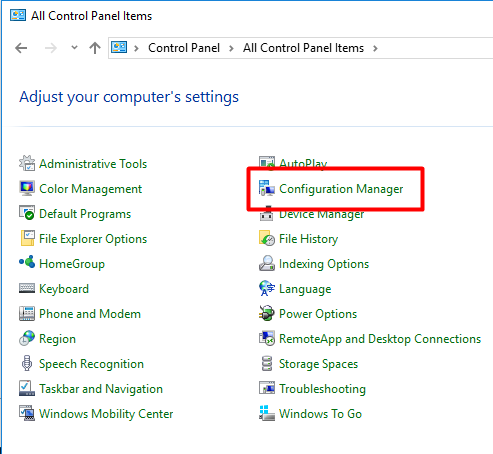
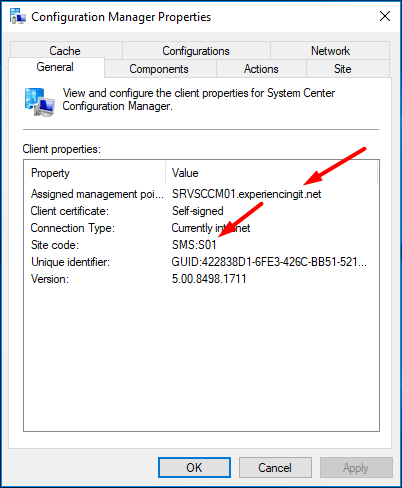
In the end, after the installation is complete, open the Control Panel and you’ll see the Configuration Manager applet. Open it and it should be pointing to the Management Point and to the Site.
And this ends this article on how to push the SCCM Client to the client machines using the SUP.
You can read more about the several deployment options here.
If you found this article useful, share it with your friends.
If you have any questions or suggestions, please leave your comment.
And… Thank you for reading!









Pingback:SCCM Current Branch Installation Guide & More - ExperiencingIT