Windows 10: Change Updates Download Folder Location
Introduction
Previously I wrote two articles – tips – about tweaking storage settings, the first one: how to prevent Windows 10 from deleting your downloaded files and the second one: how to change the default location of your downloads folder.
On that same storage subject, in this article, I will show you how to change the default location of the Windows updates download folder.
These three articles together aim to quickly tweak your Windows installation so that you free up some disk space on your system drive. Most of us use an SSD these days and at the rate that the Windows system drive fills up, most of us get caught without space pretty fast!
So, let’s get to it!
Create the new updates download location
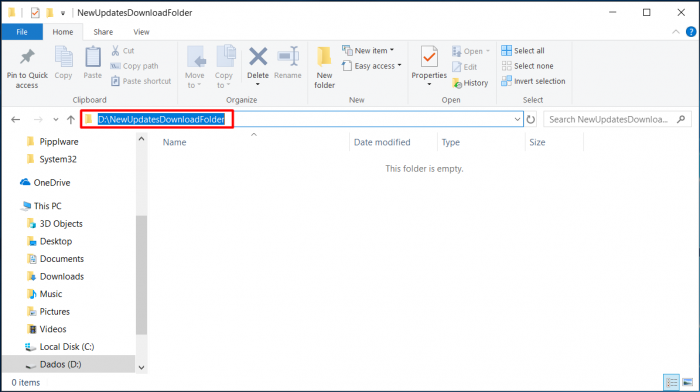
The first thing you need to do is to identify the new location where the updates will be downloaded to. Of course, the recommendation is to choose a second hard disk that is physically attached to your computer or a second partition. In my case it is a second hard drive (drive D:) and I will make a new directory called “NewUpdatesDownloadFolder”, as so:
Stop the Windows Updates service
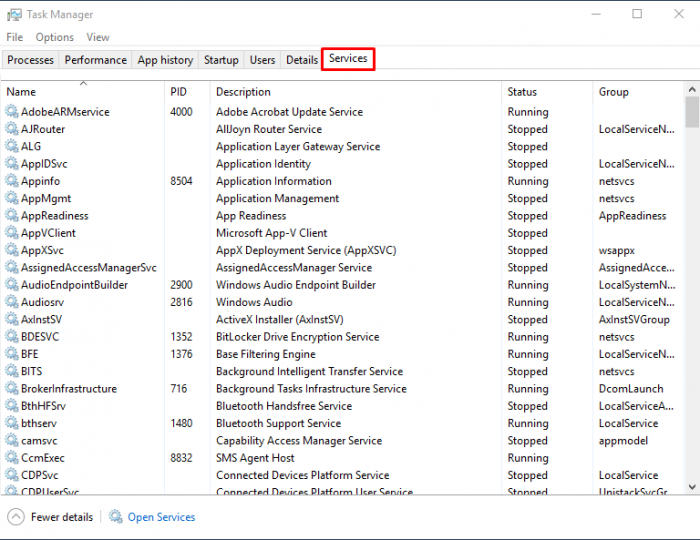
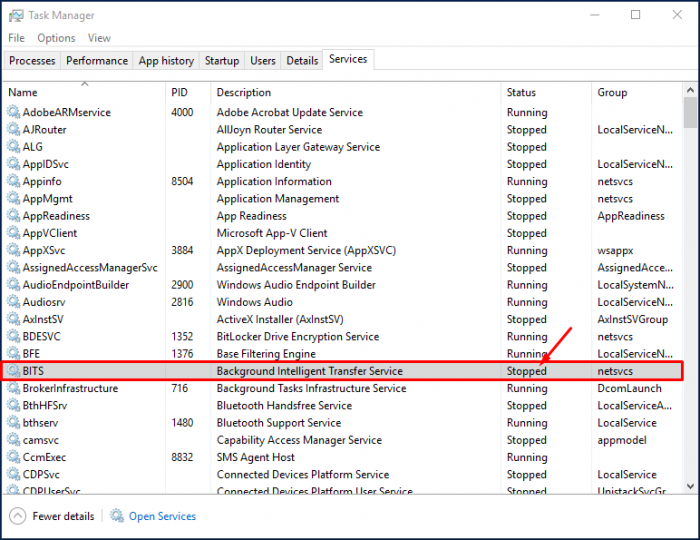
Next, you’ll need to stop the windows updates service. Press “Control+Shift+Esc” on your keyboard, at the same time. This key combination will pop-up the “Task Manager”.
Find the “Services” tab.
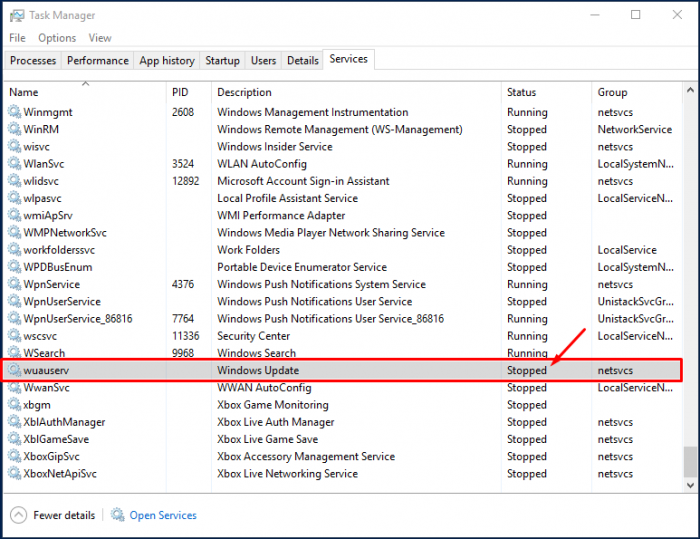
Under “Name” find the BITS service and the wuauserv service. Stop them both (first the wuauser service and then the BITS service). Right-click on the service name and choose “Stop“. Wait until both services are stopped.
Delete the old folder and link the new one
Now, with both services stopped, you can delete the old updates download folder, which is “C:\Windows\SoftwareDistribution“. No fear, go ahead.
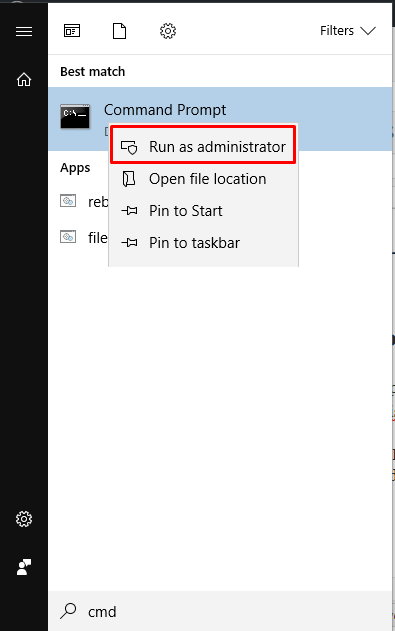
Once the folder is deleted, open a command prompt by pressing the “Start button” and typing “cmd“. Right-click on the “Command Prompt” and choose “Run as administrator”
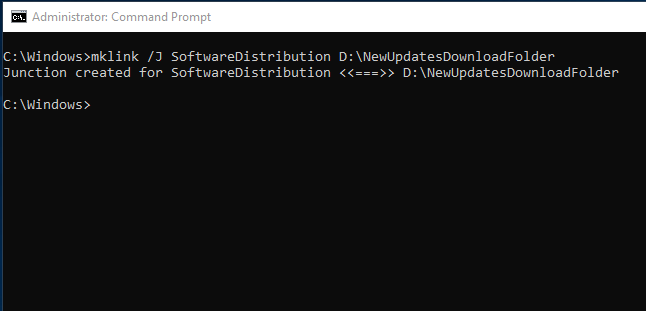
Go down one level from C:\Windows\System32 to C:\Windows and type “mklink /J SoftwareDistribution D:\NewUpdatesDownloadFolder” and press “Enter“. This will create a junction. You can read more about junctions here: https://docs.microsoft.com/en-us/windows/desktop/fileio/hard-links-and-junctions and here: https://en.wikipedia.org/wiki/NTFS_junction_point
And finally
Start the previously stopped services. For that open the “Task Manager“, right-click the services and choose “Start“. Start the BITS service and then the wuausrv service (Windows Update).
And that’s it! We have now changed the default location to where Windows updates will be downloaded, saving a bit more space on our system drive! Now really, this will save you a huge amount of space on the system drive! As we all know, Windows update are now massive in size!
As always, if you found this article useful, share it with your friends.
If you have any questions or suggestions, please leave your comment.
And… Thank you for reading!


